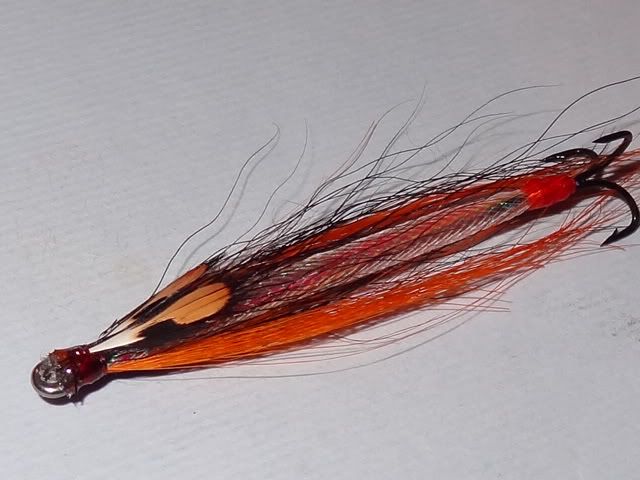
I bang on and on endlessly about this pattern for which I will apologise upfront. The fact is however that for sea trout it just works and works very well. It is by no means the only method of dressing a snake fly. Other anglers and fly dressers utilise braid which I am reliably informed works well enough. It is a matter of personal choice which you dress and fish with. Let's get on with it.
Tying Materials
Carcass: A Partridge X1 Black Outpoint Treble Hook attached via a doubled length of 25lbs BS Gorilla fluorocarbon to a cut down 1/0 sea fishing hook.
Thread: Orange at rear end and black at front end
Tag: No4 Glo Brite Floss.
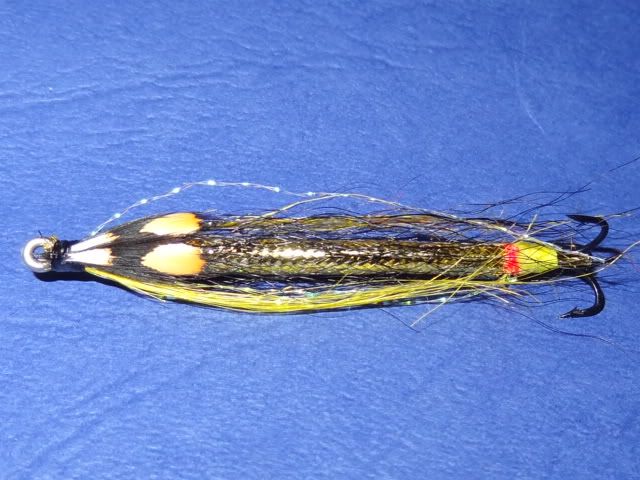
Body: Medium pearl Mylar with strands of No2 Pink, No10 Yellow and No7 Orange floss inserted.
Wing: Slim bunches of orange dyed Cashmere goat hair overlaid with slim bunched of black dyed bucktail.
Cheeks: Jungle cock nails.
Tying Method
Step 1: Secure the hook in the vice with the point(s) protruding.
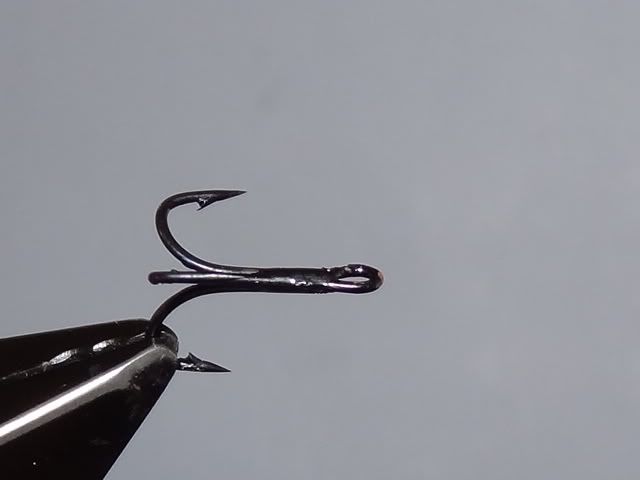
Step 2: Attach orange tying thread and feed a length of monofilament through the eye around the back of the treble and back through the eye.
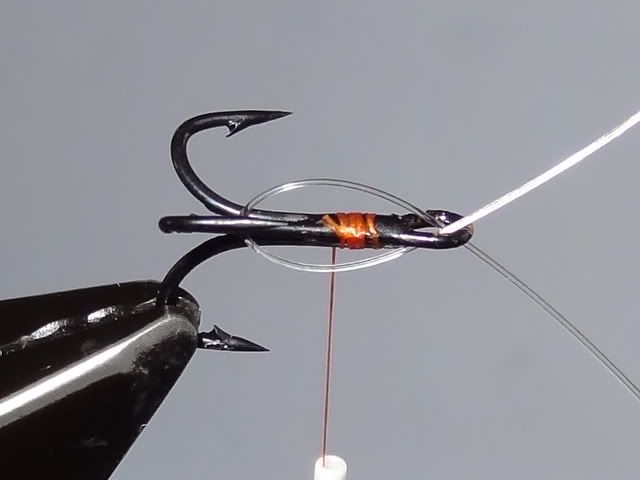
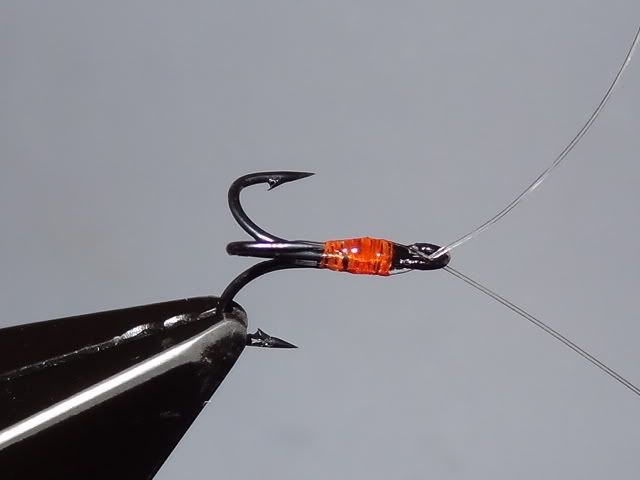
Step 3: Whip the mono to the shank. Whip finish and apply a small dab of superglue or varnish.
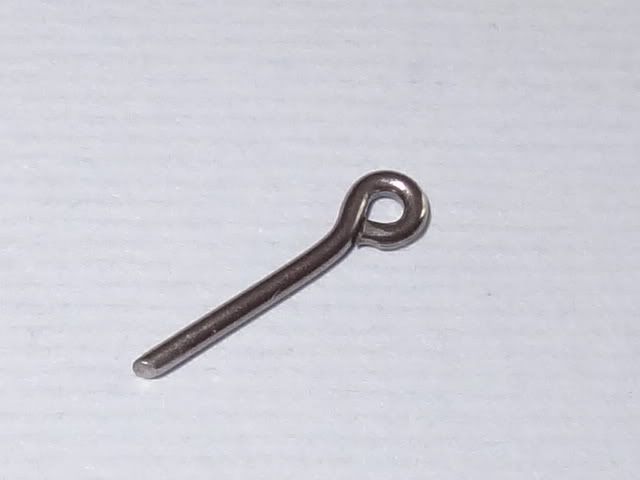
Step 4: Using a pair of pliers or wire cutters cut a 1/0 sea fishing hook down so that the eye and about 1/8" of shank remains. Smooth the burred end with suitable tooling to prevent the ragged end from damaging the monofilament.
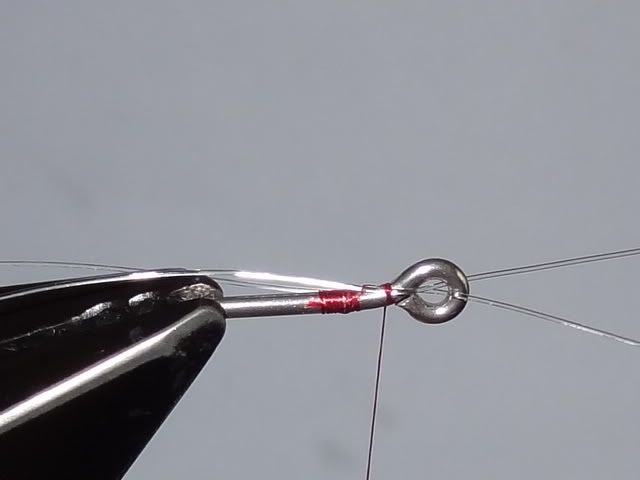
Step 5: Insert the modified hook in the vice and attach black tying thread. Feed the flying ends of the monofilament through the eye from opposite directions and fold them back down the hook shank. Whip down ensuring that the monofilament remains untwisted or kinked. Trim waste ends, bind down, whip finish and apply a dab of superglue. It is more efficient to do the carcasses in batches for dressing later.
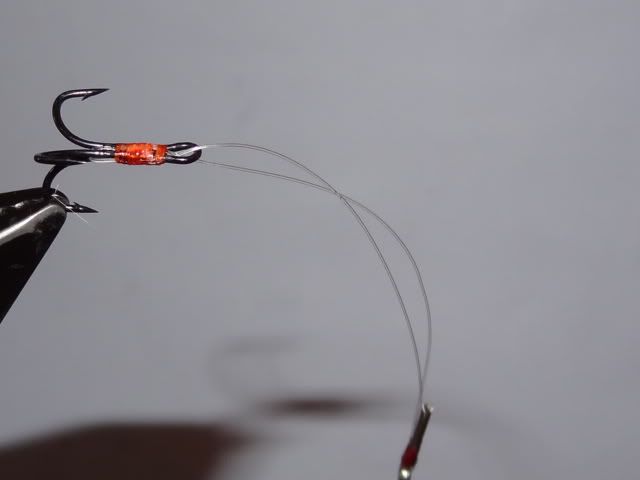
Step 6: Mount the treble hook in the vice. I mentioned earlier that the mono should not be twisted. This is absolutely critical to ensure that the fly swims at the correct attitude. The carcass will bend significantly in the vice. Do not worry this will 'firm up' later.
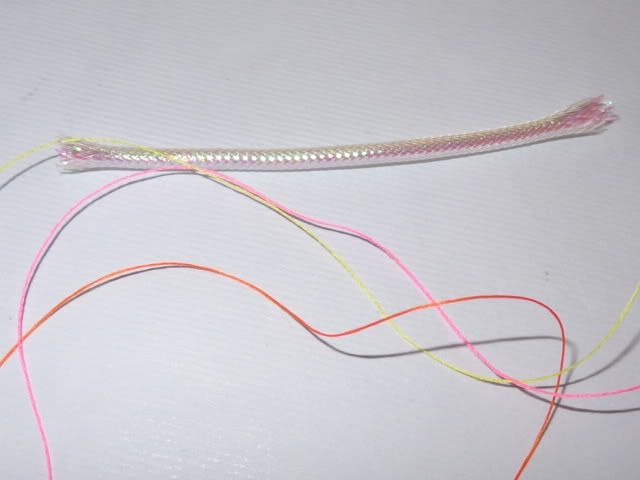
Step 7: Prepare your Mylar by cutting to required length and removing the fibre core. Cut coloured flosses to length.
Step 8: Stick a bobbin thread up the Mylar tube. Drag the coloured sections of floss through the centre and taking care insert the whole assembly over the carcass. Attach orange tying thread and whip down the Mylar and floss to the treble hook. Trim the waste end and tie down the butts. Tie in a doubled length of red Glo Brite Floss.
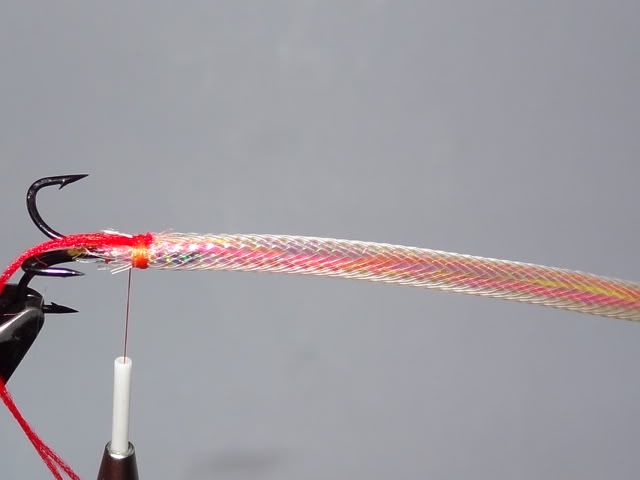
Step 9: Wind the floss and whip down with thread, whip finish and apply a small dab of superglue.
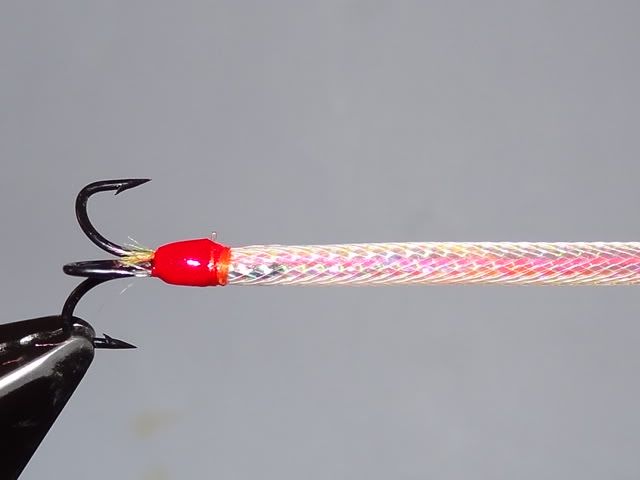
Step 10: Remove the hook from the vice. GENTLY apply a small amount of pressure to the Mylar dragging it forward. Attach tying thread and whip Mylar down. If you apply too much tension when dragging the Mylar forward the whole carcass will distort and will not swim with the correct attitude. Trim waste end of Mylar and tie down butt ends. Insert the eye in the vice as shown.
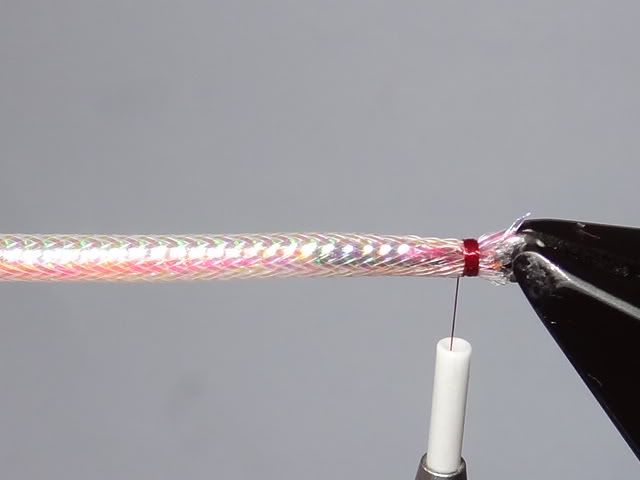
Step 11: Tie in a slim bunch of orange dyed Cashmere goat hair.
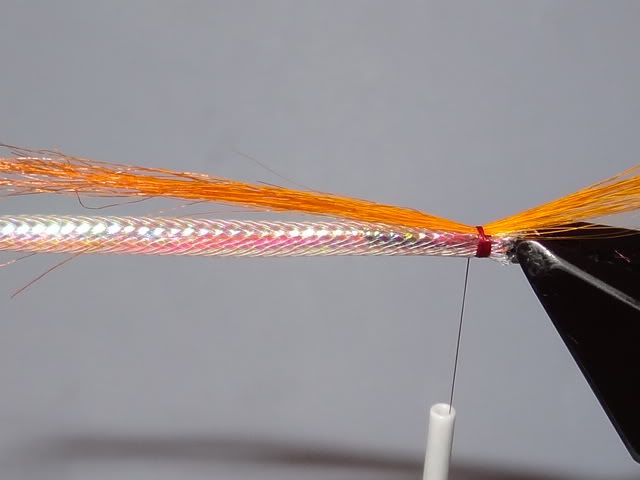
Step 12: Rotate he vice and repeat.You should now have hair on both shoulders of the fly. Kinda hippy stylee, yeah baby.
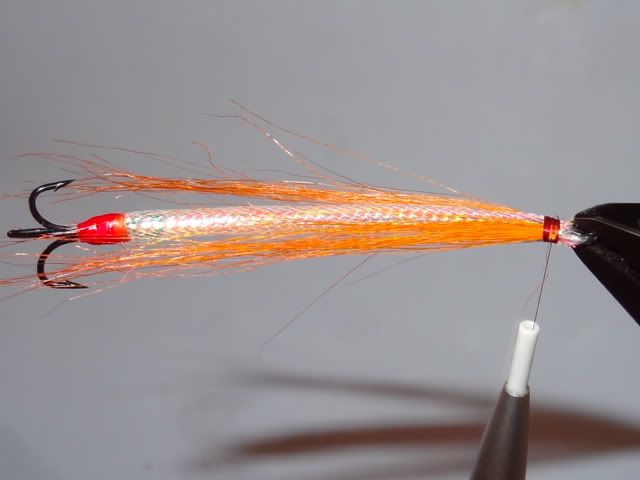
Step 13: Rotate the vice 90 degrees. Apply a slim bunch of black dyed bucktail. Rotate the vice 180 degrees and repeat.
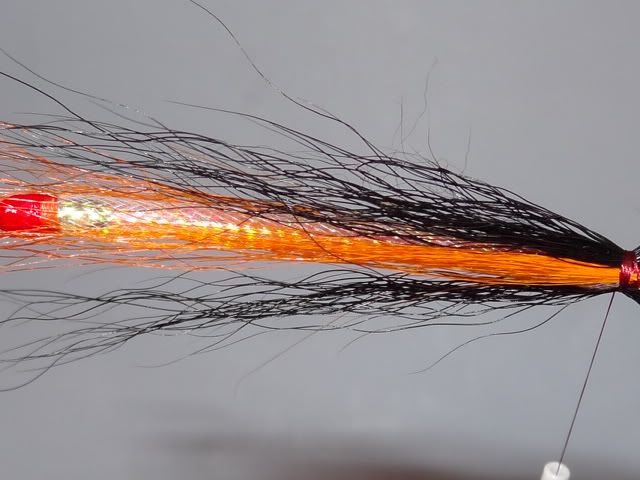
Step 14: 'Right' the fly and tie in a matched pair of Jungle cock nails.
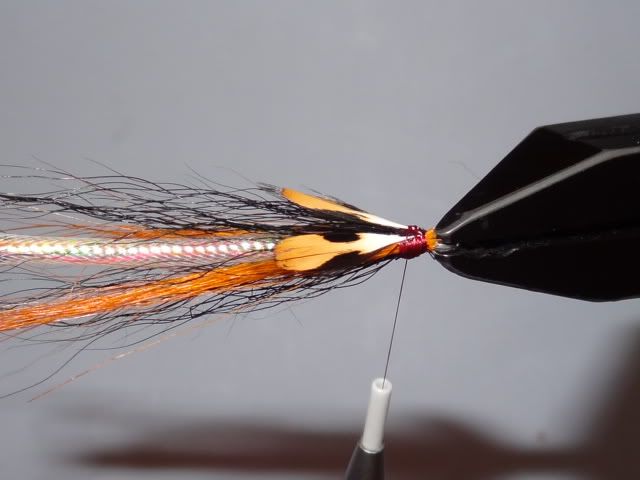
Step 15: The requirement is now to whip finish the fly with the eye in the vice. Impossible huh??????? Well no not really. There has been a lot written about whip finishing the fly in your hand. Naaaaaaahhhhhh not for me. Run a small seam of superglue up the thread and wind it 5 times. Let it stand for 90 seconds and trim the thread. Varnish immediately and it is sealed for life. Alternatively whip finish in your hand and book yourself an appointment at your local A+E while they remove a big angry treble from your palm. Your choice.
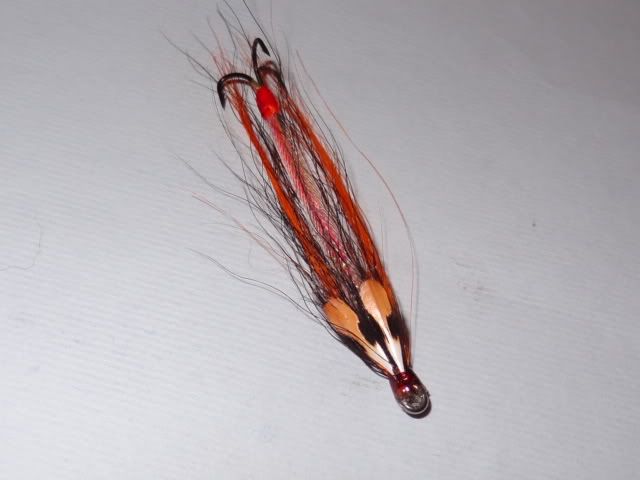
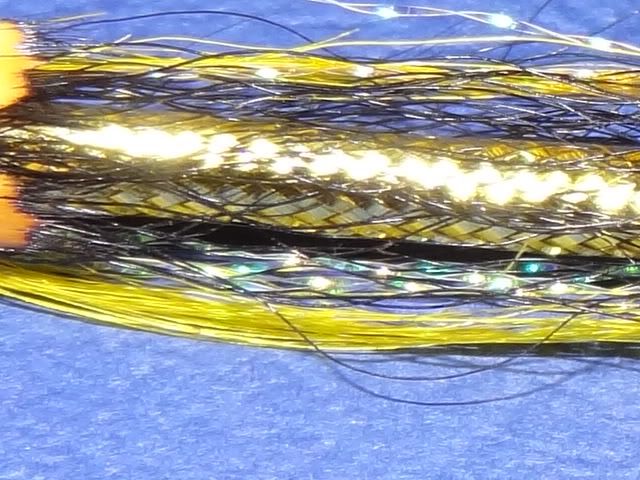
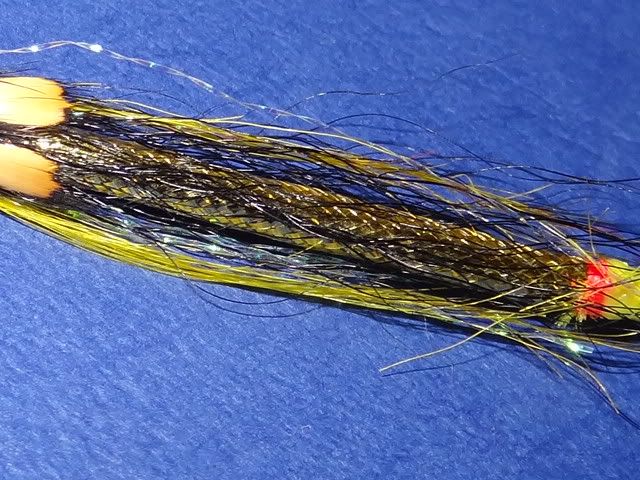
Step 17: A 'close up' view of the floss showing through the pearl Mylar. My attempt to represent the translucence that the natural sand eel adopts which this pattern is designed to represent.
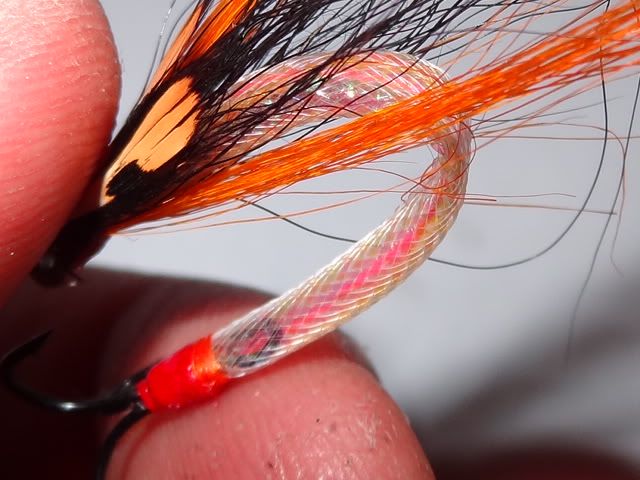
Step 18: Happy fishing
Tying Materials
Carcass: A Partridge X1 Black Outpoint Treble Hook attached via a doubled length of 25lbs BS Gorilla fluorocarbon to a cut down 1/0 sea fishing hook.
Thread: Orange at rear end and black at front end
Tag: No4 Glo Brite Floss.
Body: Medium pearl Mylar with strands of No2 Pink, No10 Yellow and No7 Orange floss inserted.
Wing: Slim bunches of orange dyed Cashmere goat hair overlaid with slim bunched of black dyed bucktail.
Cheeks: Jungle cock nails.
Tying Method
Step 1: Secure the hook in the vice with the point(s) protruding.

Step 2: Attach orange tying thread and feed a length of monofilament through the eye around the back of the treble and back through the eye.

Step 3: Whip the mono to the shank. Whip finish and apply a small dab of superglue or varnish.

Step 4: Using a pair of pliers or wire cutters cut a 1/0 sea fishing hook down so that the eye and about 1/8" of shank remains. Smooth the burred end with suitable tooling to prevent the ragged end from damaging the monofilament.

Step 5: Insert the modified hook in the vice and attach black tying thread. Feed the flying ends of the monofilament through the eye from opposite directions and fold them back down the hook shank. Whip down ensuring that the monofilament remains untwisted or kinked. Trim waste ends, bind down, whip finish and apply a dab of superglue. It is more efficient to do the carcasses in batches for dressing later.

Step 6: Mount the treble hook in the vice. I mentioned earlier that the mono should not be twisted. This is absolutely critical to ensure that the fly swims at the correct attitude. The carcass will bend significantly in the vice. Do not worry this will 'firm up' later.

Step 7: Prepare your Mylar by cutting to required length and removing the fibre core. Cut coloured flosses to length.

Step 8: Stick a bobbin thread up the Mylar tube. Drag the coloured sections of floss through the centre and taking care insert the whole assembly over the carcass. Attach orange tying thread and whip down the Mylar and floss to the treble hook. Trim the waste end and tie down the butts. Tie in a doubled length of red Glo Brite Floss.

Step 9: Wind the floss and whip down with thread, whip finish and apply a small dab of superglue.

Step 10: Remove the hook from the vice. GENTLY apply a small amount of pressure to the Mylar dragging it forward. Attach tying thread and whip Mylar down. If you apply too much tension when dragging the Mylar forward the whole carcass will distort and will not swim with the correct attitude. Trim waste end of Mylar and tie down butt ends. Insert the eye in the vice as shown.

Step 11: Tie in a slim bunch of orange dyed Cashmere goat hair.

Step 12: Rotate he vice and repeat.You should now have hair on both shoulders of the fly. Kinda hippy stylee, yeah baby.

Step 13: Rotate the vice 90 degrees. Apply a slim bunch of black dyed bucktail. Rotate the vice 180 degrees and repeat.

Step 14: 'Right' the fly and tie in a matched pair of Jungle cock nails.

Step 15: The requirement is now to whip finish the fly with the eye in the vice. Impossible huh??????? Well no not really. There has been a lot written about whip finishing the fly in your hand. Naaaaaaahhhhhh not for me. Run a small seam of superglue up the thread and wind it 5 times. Let it stand for 90 seconds and trim the thread. Varnish immediately and it is sealed for life. Alternatively whip finish in your hand and book yourself an appointment at your local A+E while they remove a big angry treble from your palm. Your choice.

Step 17: A 'close up' view of the floss showing through the pearl Mylar. My attempt to represent the translucence that the natural sand eel adopts which this pattern is designed to represent.

Step 18: Happy fishing


Comment