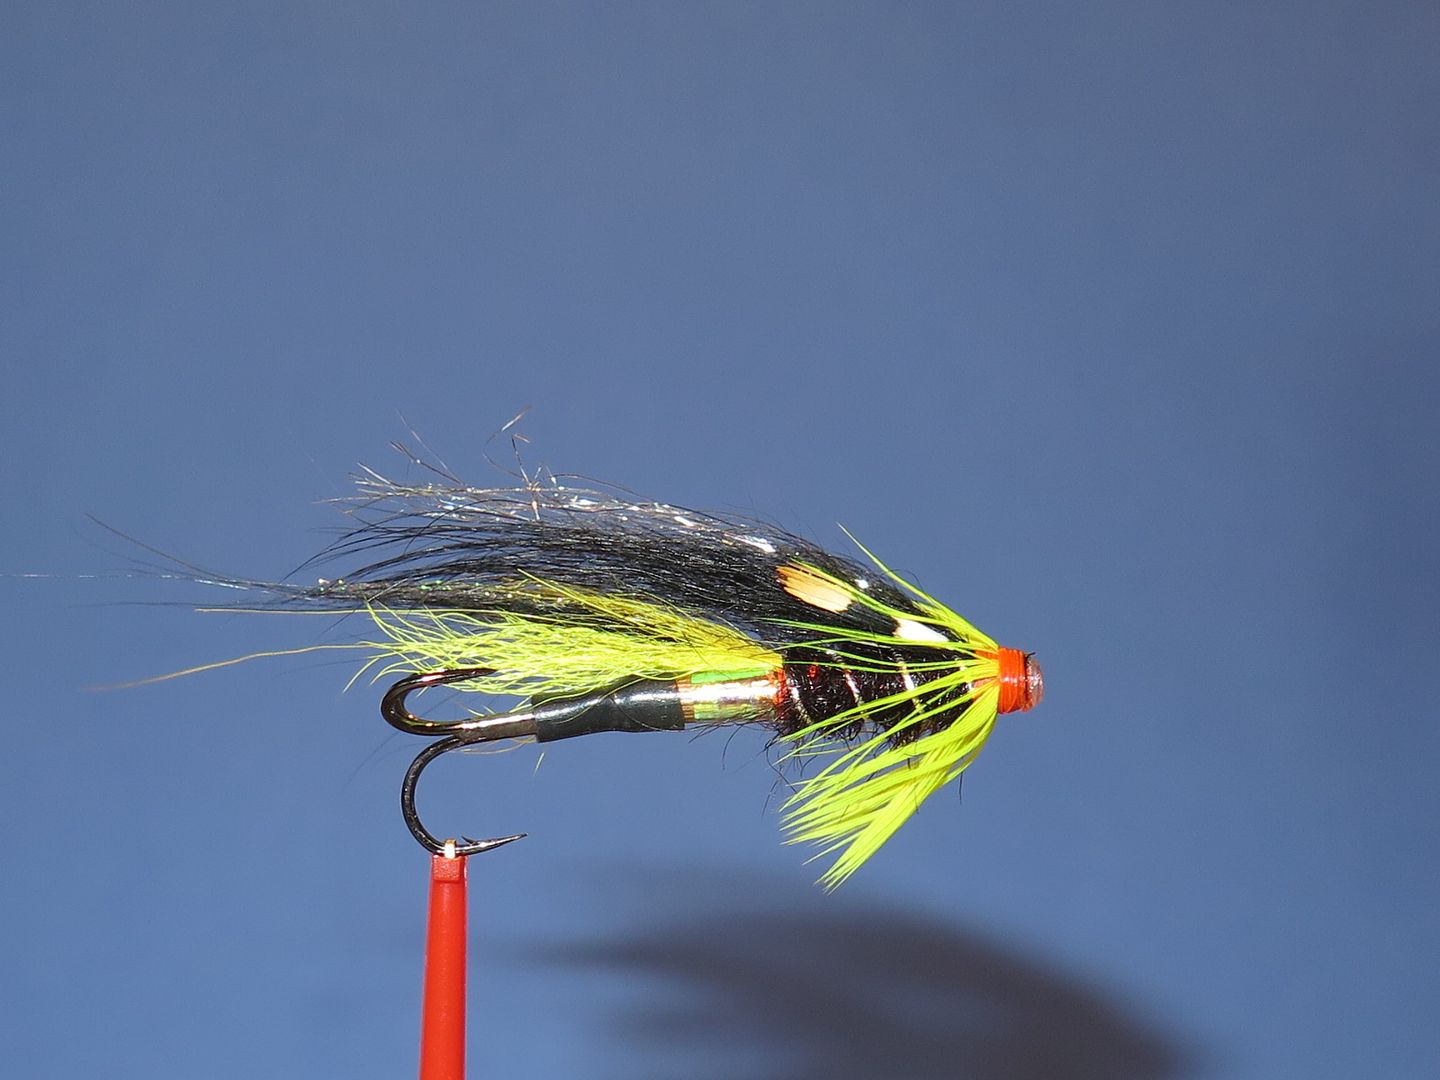
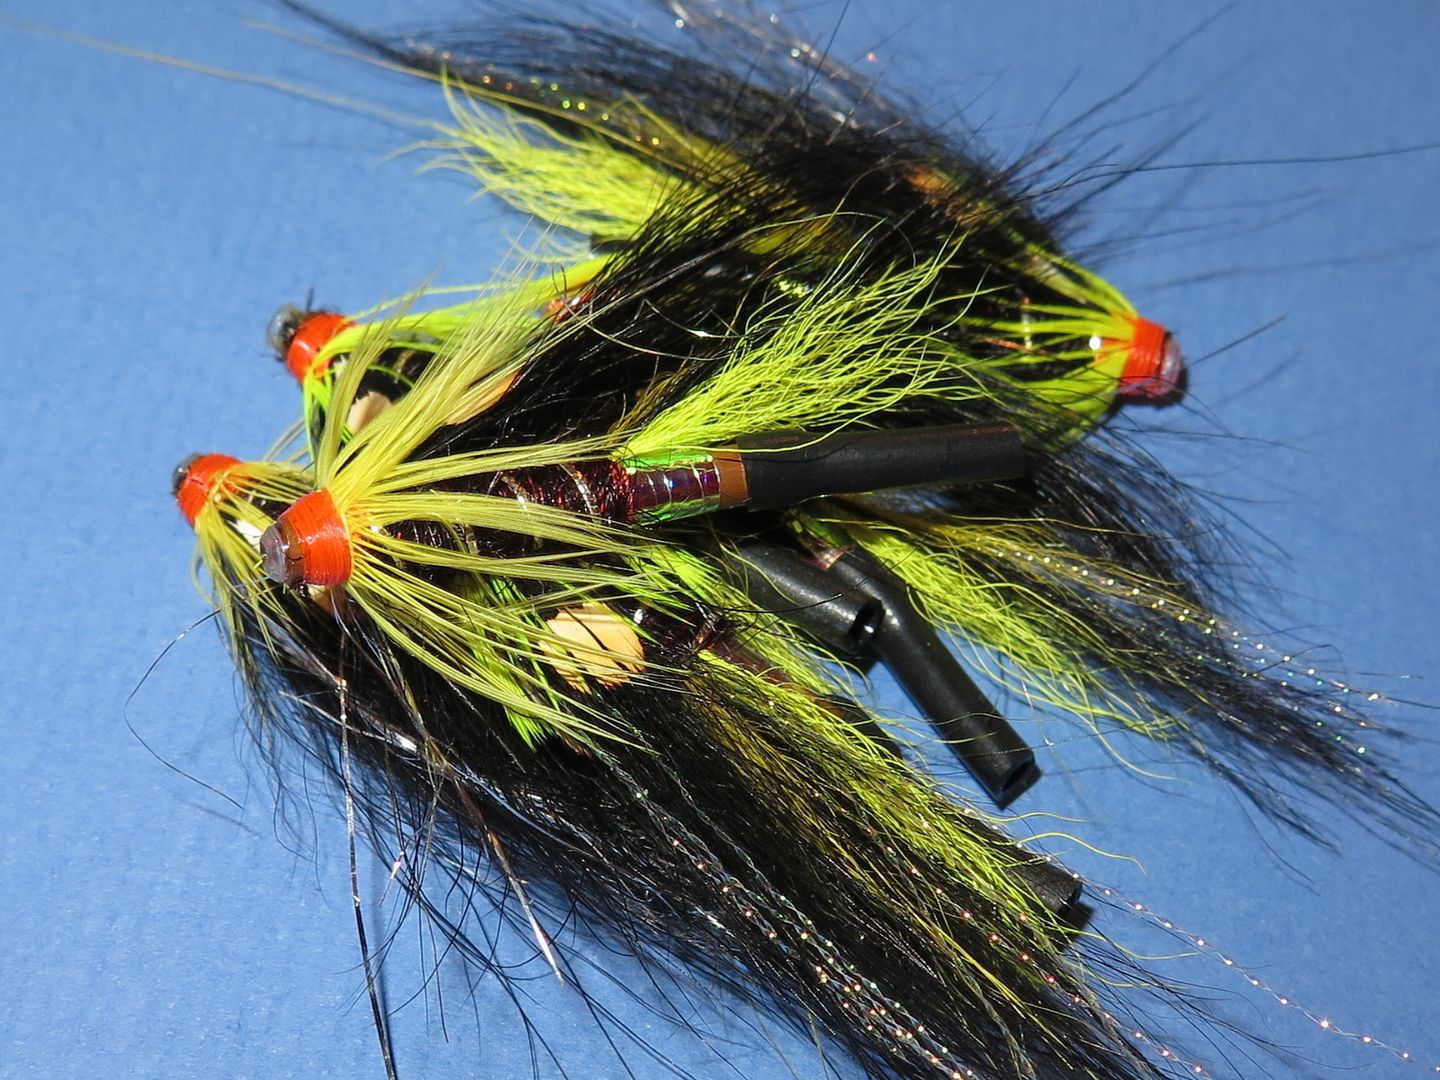
This pattern was developed by Ross McDonald and comes from a stable of patterns with an excellent pedigree. Its sister patterns the Calvin Shrimp and Park Shrimp are all excellent patterns. All 3 patterns can of course be dressed on singles, doiubles, trebles and tubes. We will however target early, spring fish and with this is mind I demonstrate on copper.
Tying Material
Tube: Veniard copper Slipstream 1" long
Thread: Uni 6/0 fire orange
Tag: Large Opal Mirage Uni tinsel
Tail: Yellow dyed calf tail overlaid with black dyed Arctic Runner overlaid with doubled strands of fine mother of pearl Krystalflash overlaid with yellow dyed Arctic runner
Rib: Medium silver French Oval
Body: Black dyed baby seals fur
Wing: Black dyed Arctic fox overlaid with fine silver Angel Hair
Cheeks: Jungle cock nails
Hackle: Yellow dyed Chevron hen saddle
Tying Method
Step 1: Seccure the tube in the collet
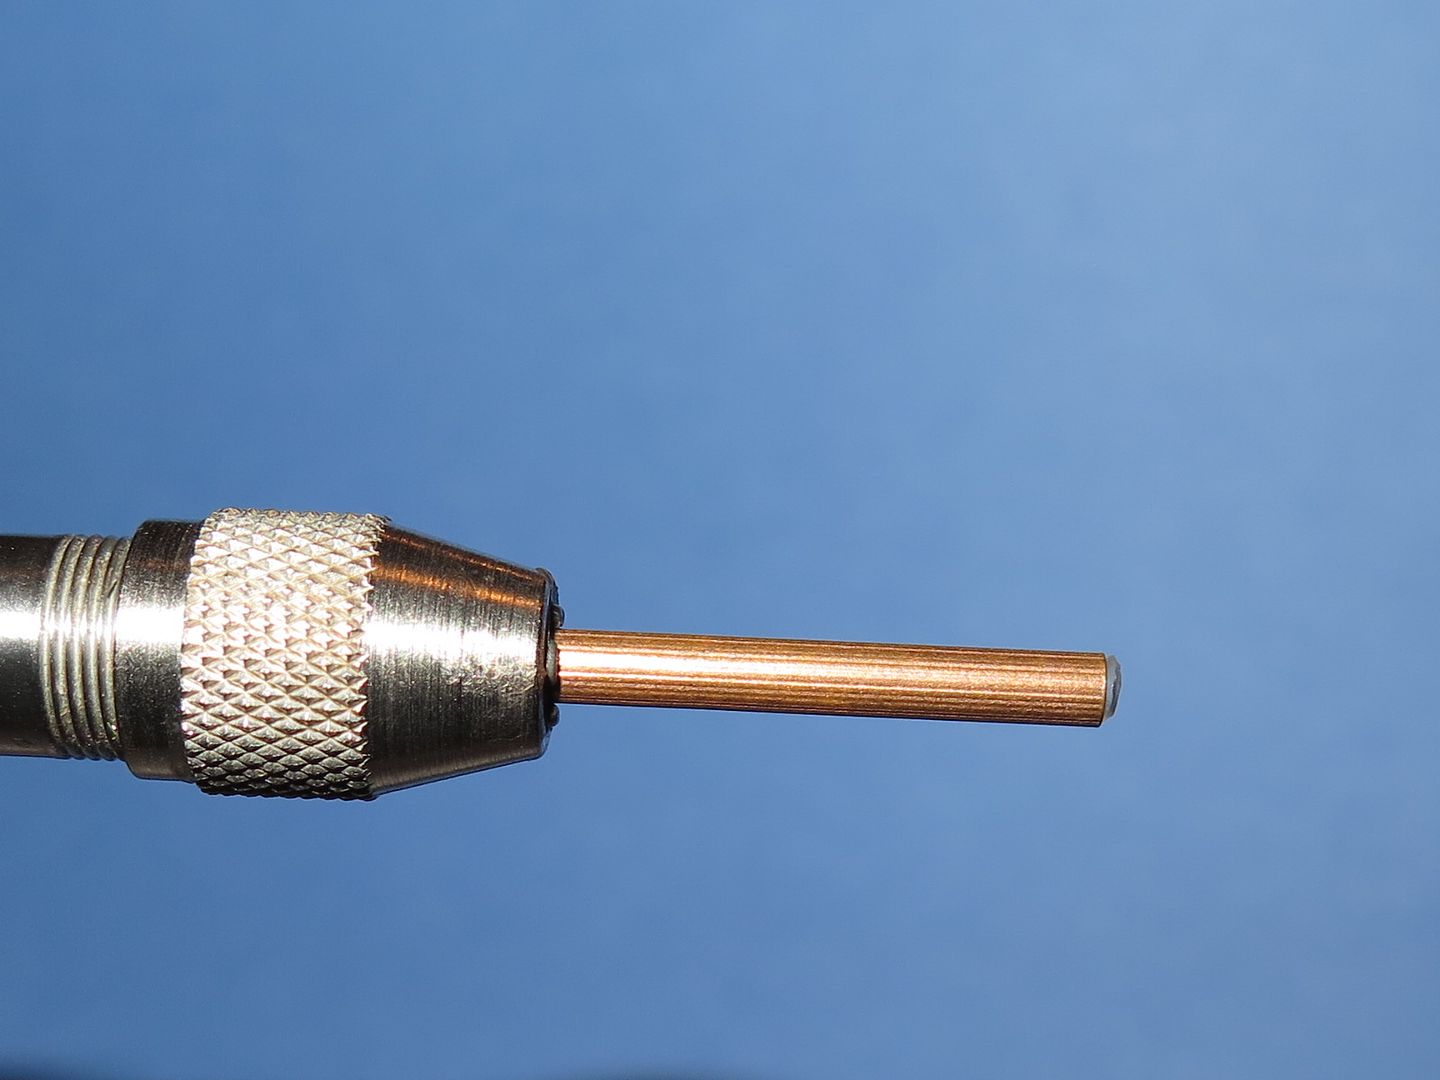
Step 2: Attach thread rear of centre of tube
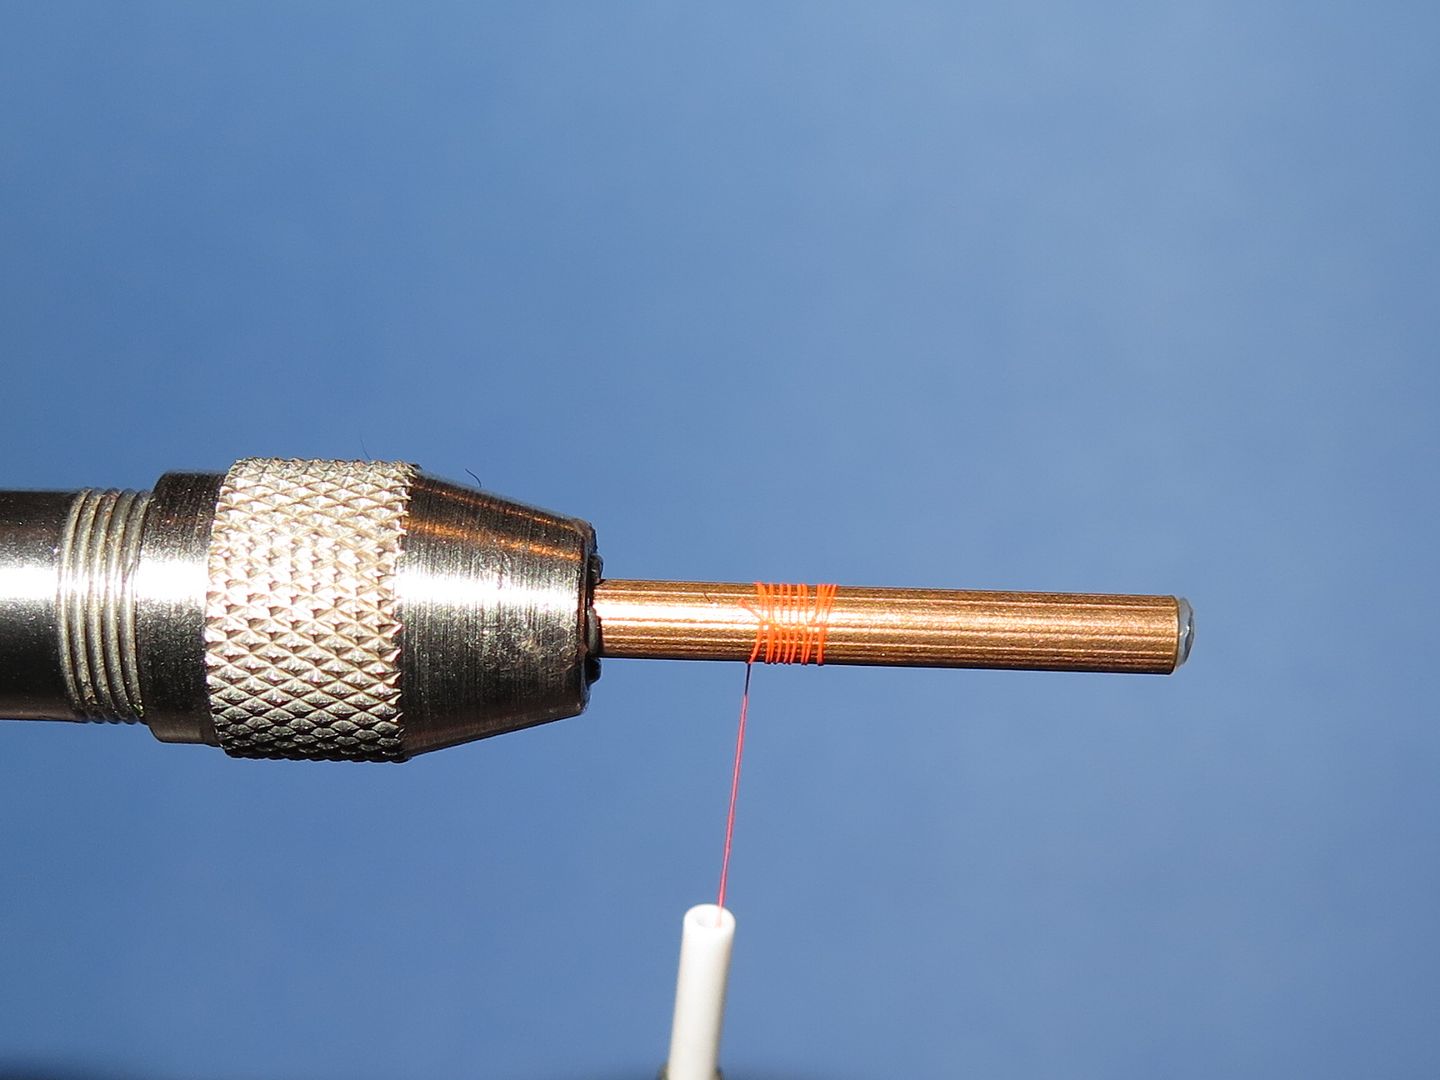
Step 3: Cut a length of large Opal Mirage tinsel to a sharp point and catch in with a couple of turns of tying thread.
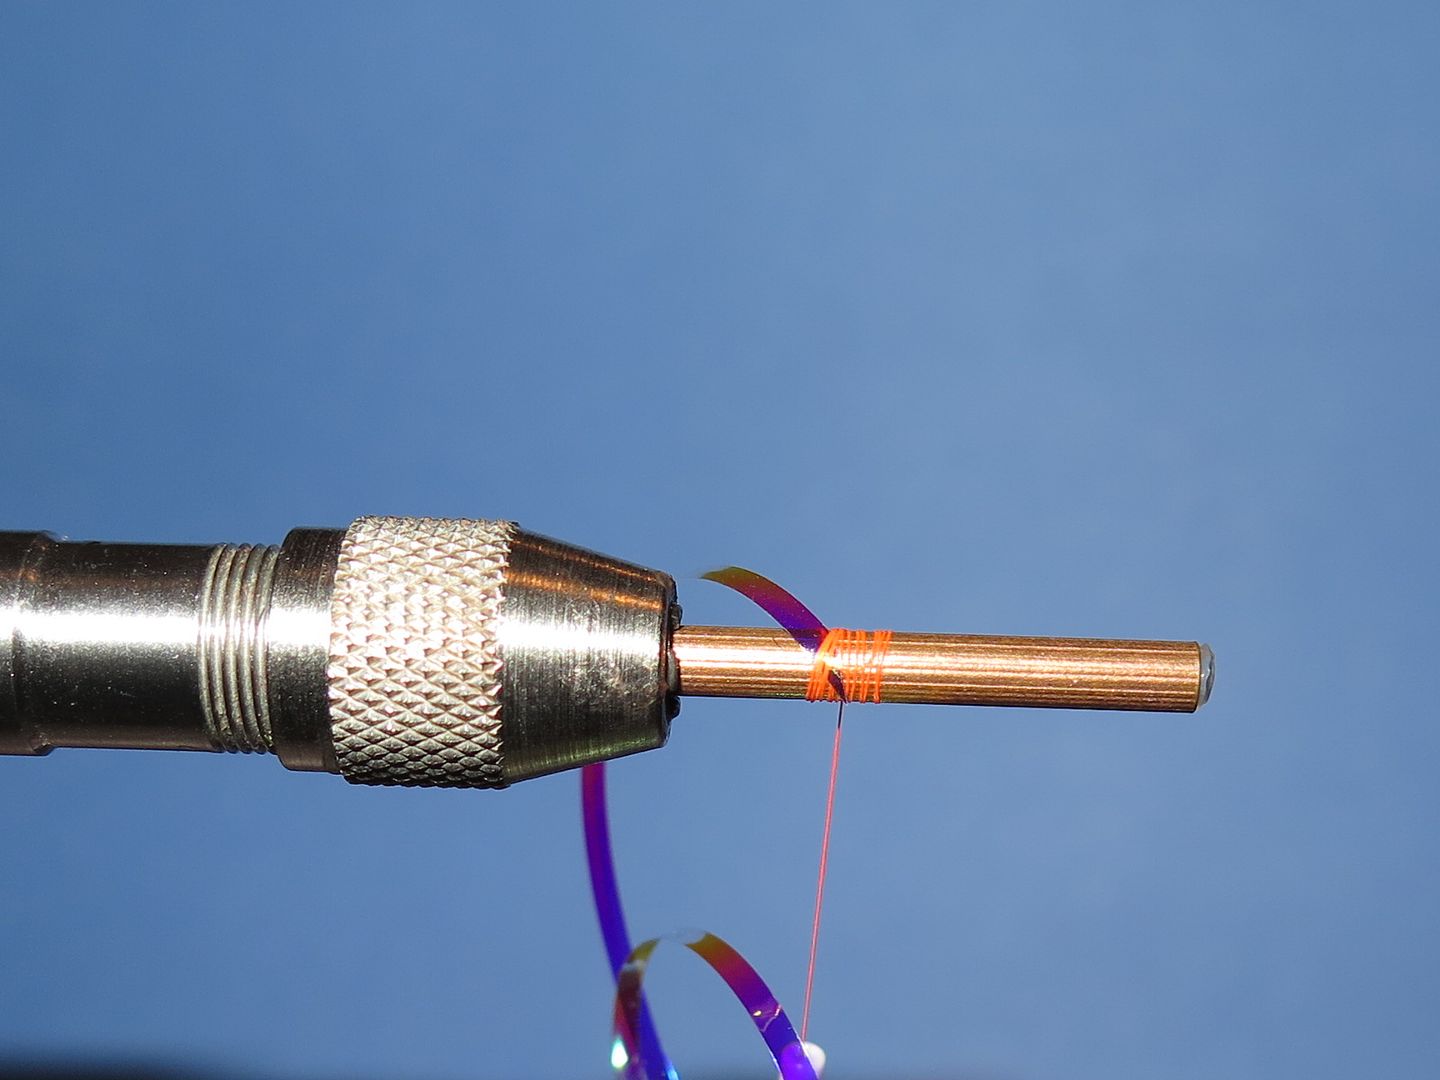
Step 4: Wind the tinsel to the back of the tube and forward again. We are looking to cover approximately 1/4 of the tube length. Tie in and trim waste end.
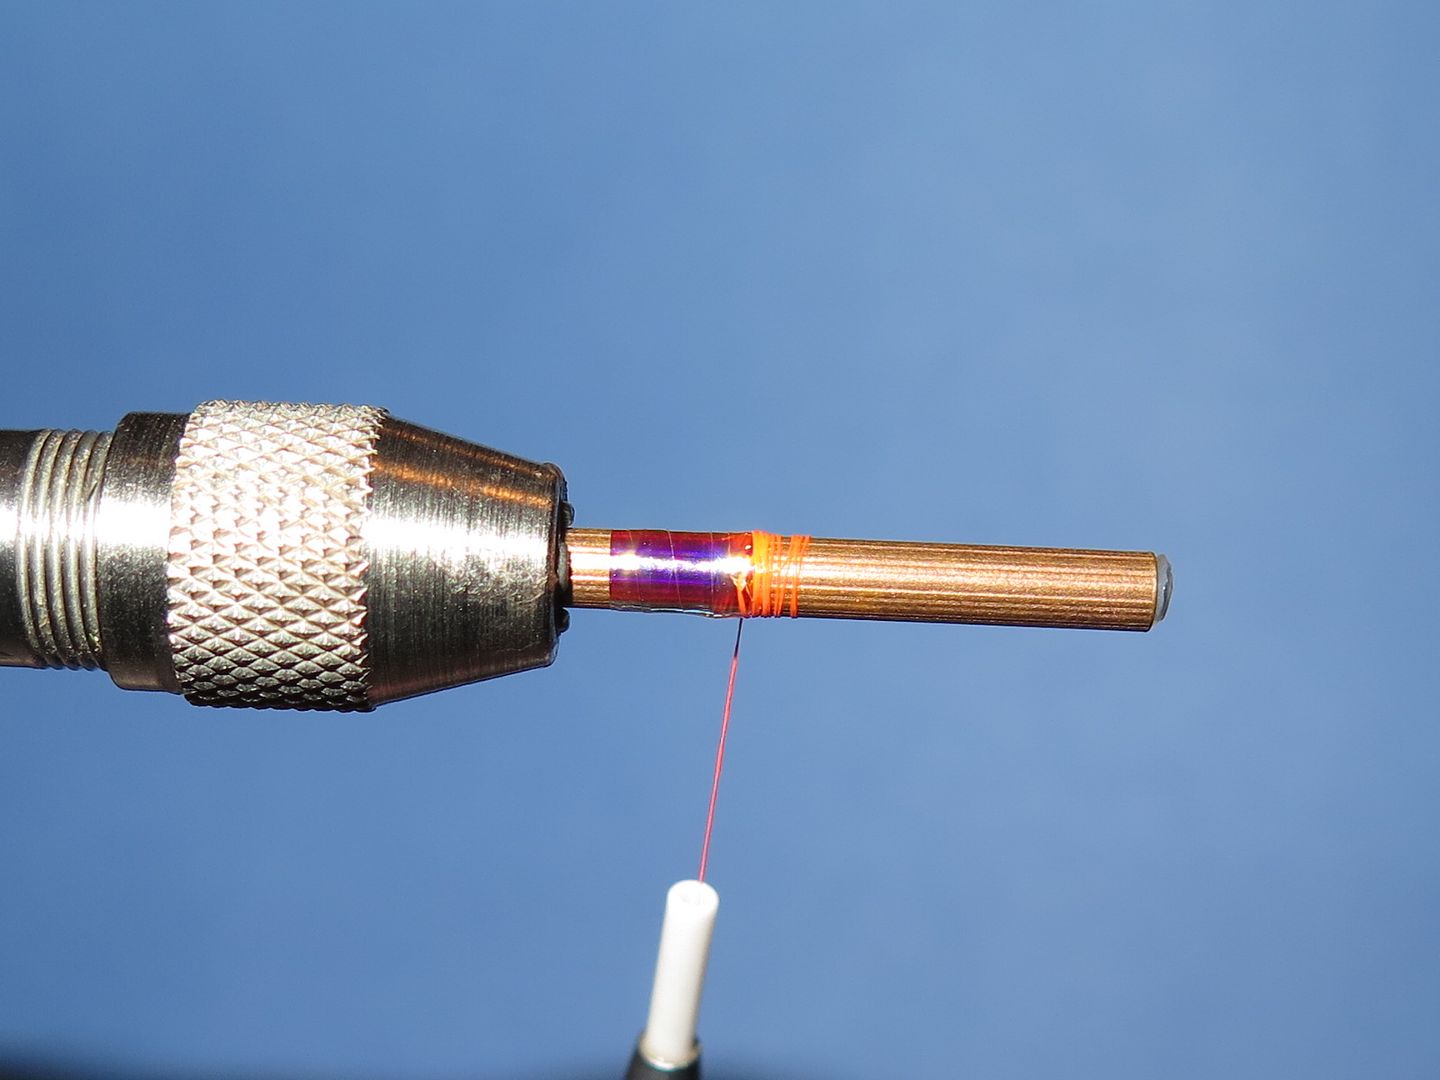
Step 5: Tie in a slim 'pouffe' of yellow dyed calf tail. It should be noted at this stage that the original pattern calls for Arctic Runner at this stage. While offering suoerb mobility this product has a tendency to wrap and foul hook points if unsupported.
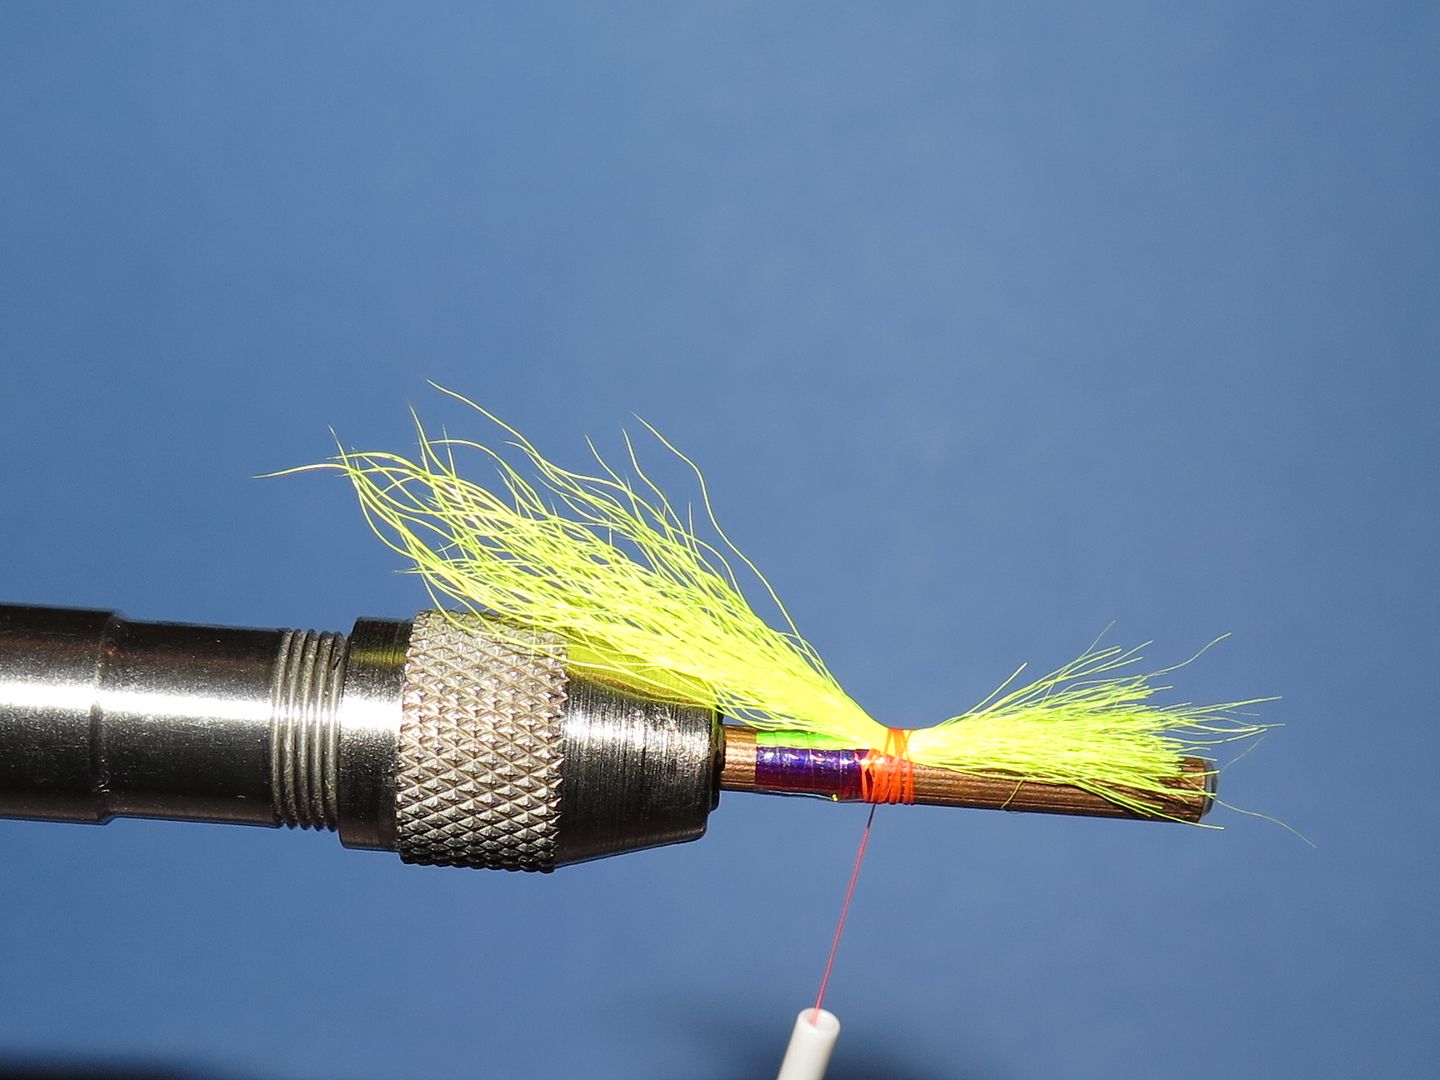
Step 6: Overlay the calf tail with a slim bunch of black dyed Arctic Runner. The material should extend longer than the yellow calf tail.
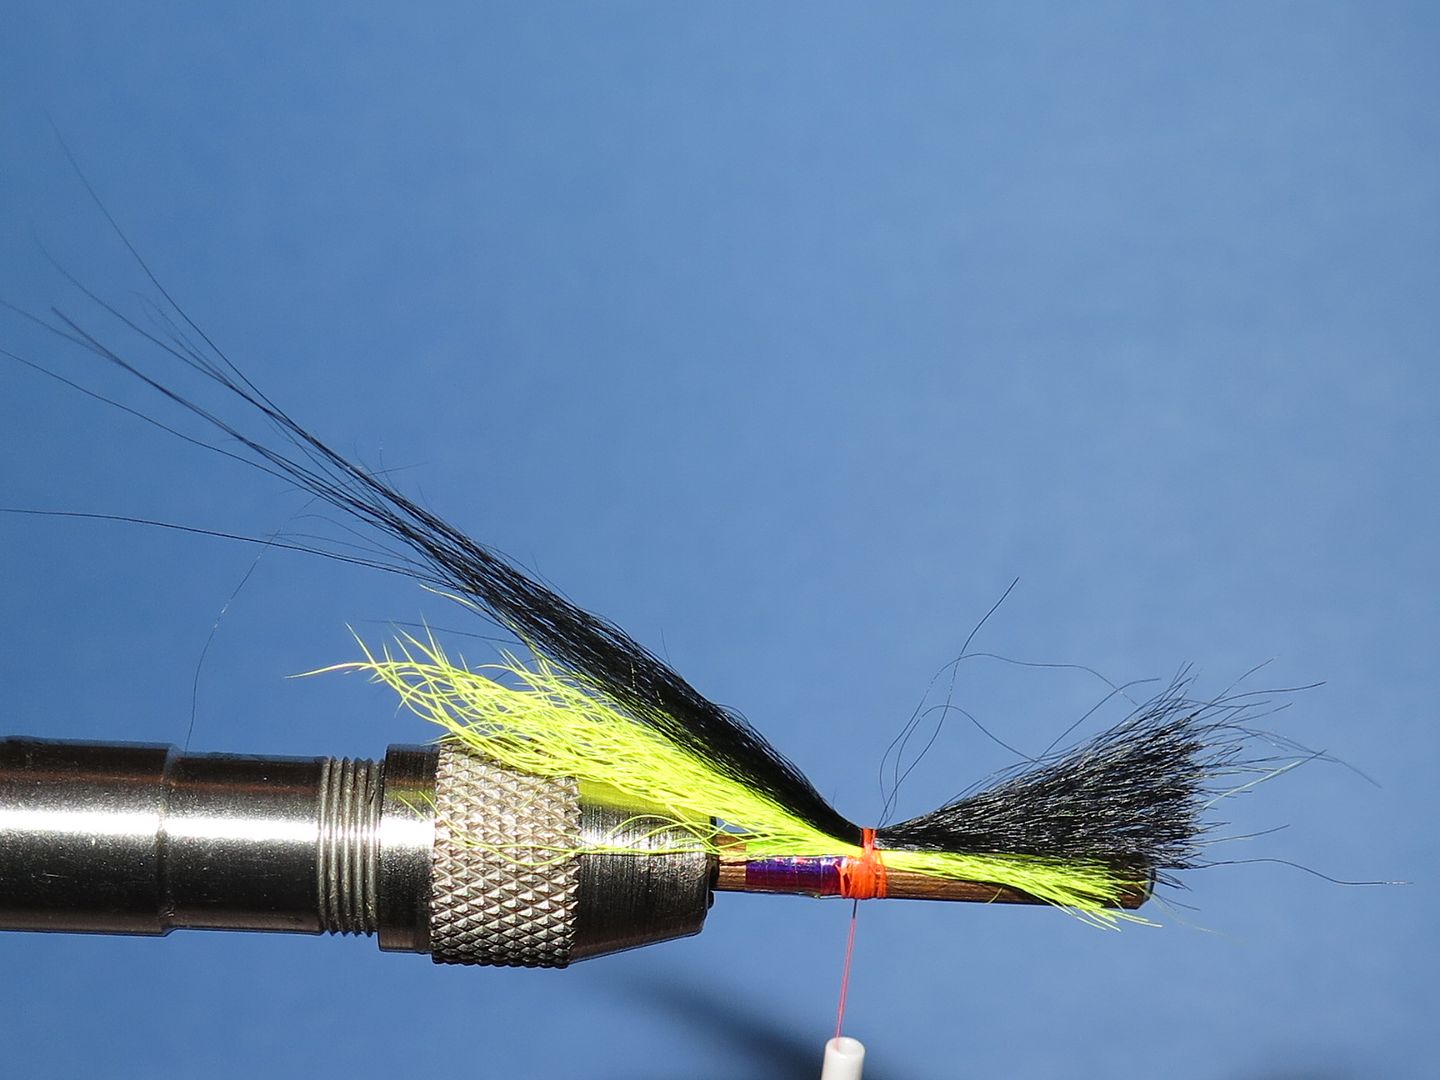
Step 7: Overlay the material with 2 doubled lengths of fine mother of pearl Krystalflash. Trim to approximately the length of the black material.
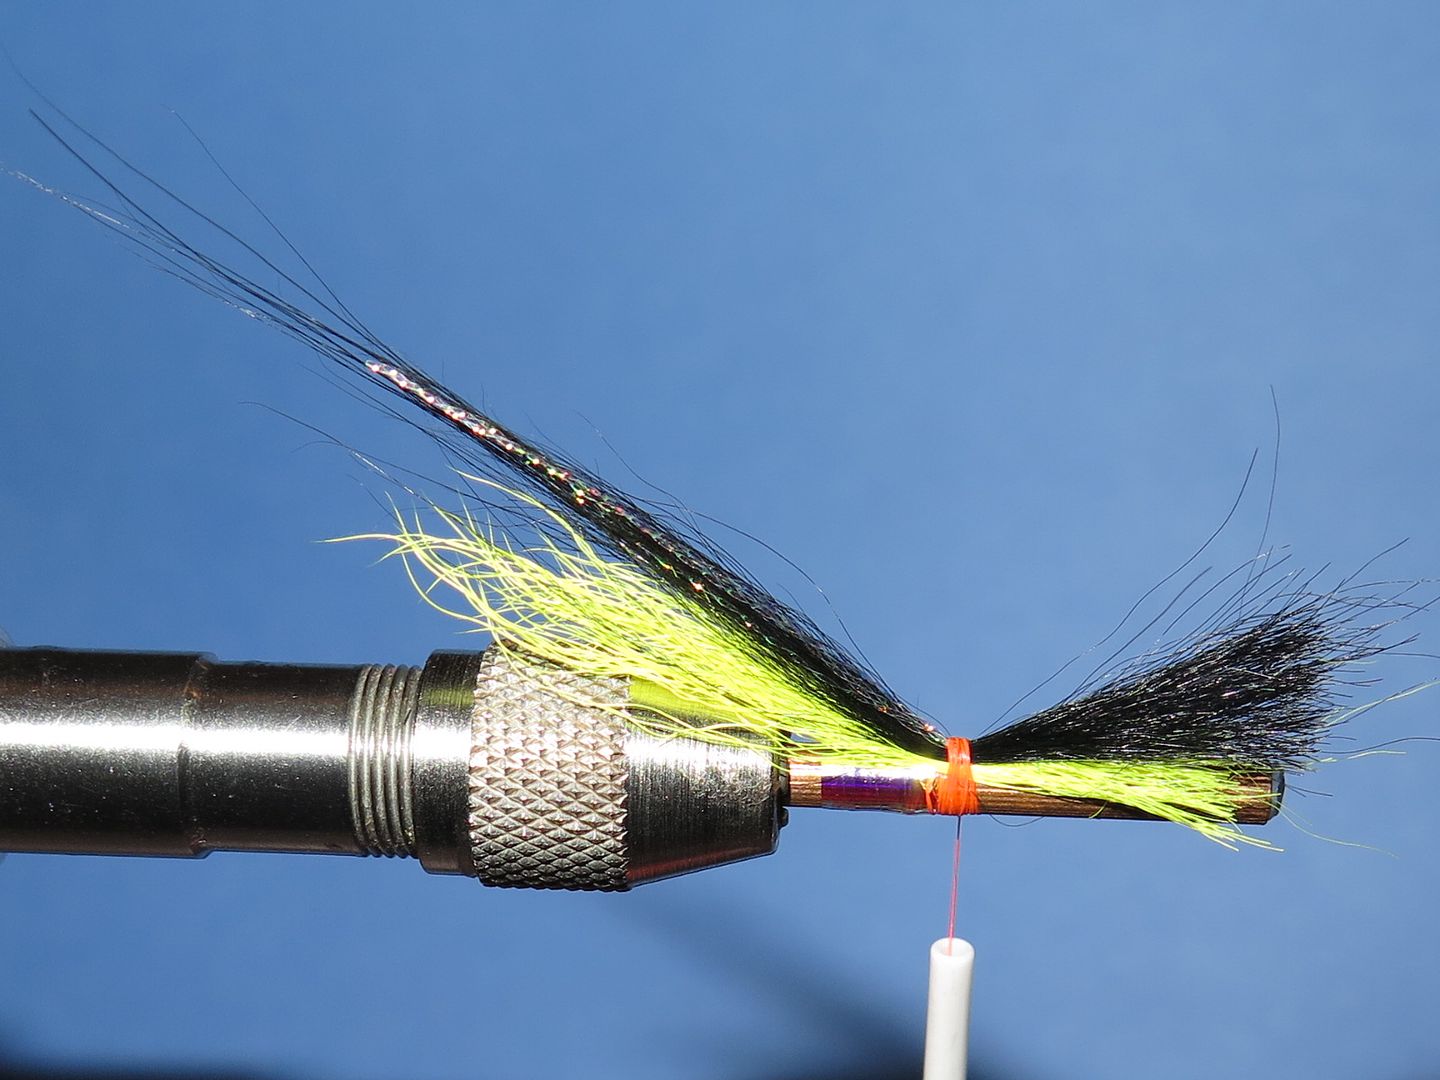
Step 8: Overlay the composite tail with the final material which is yellow dyed Arctic Runner. It should be tied in shorter than the previous black layer.
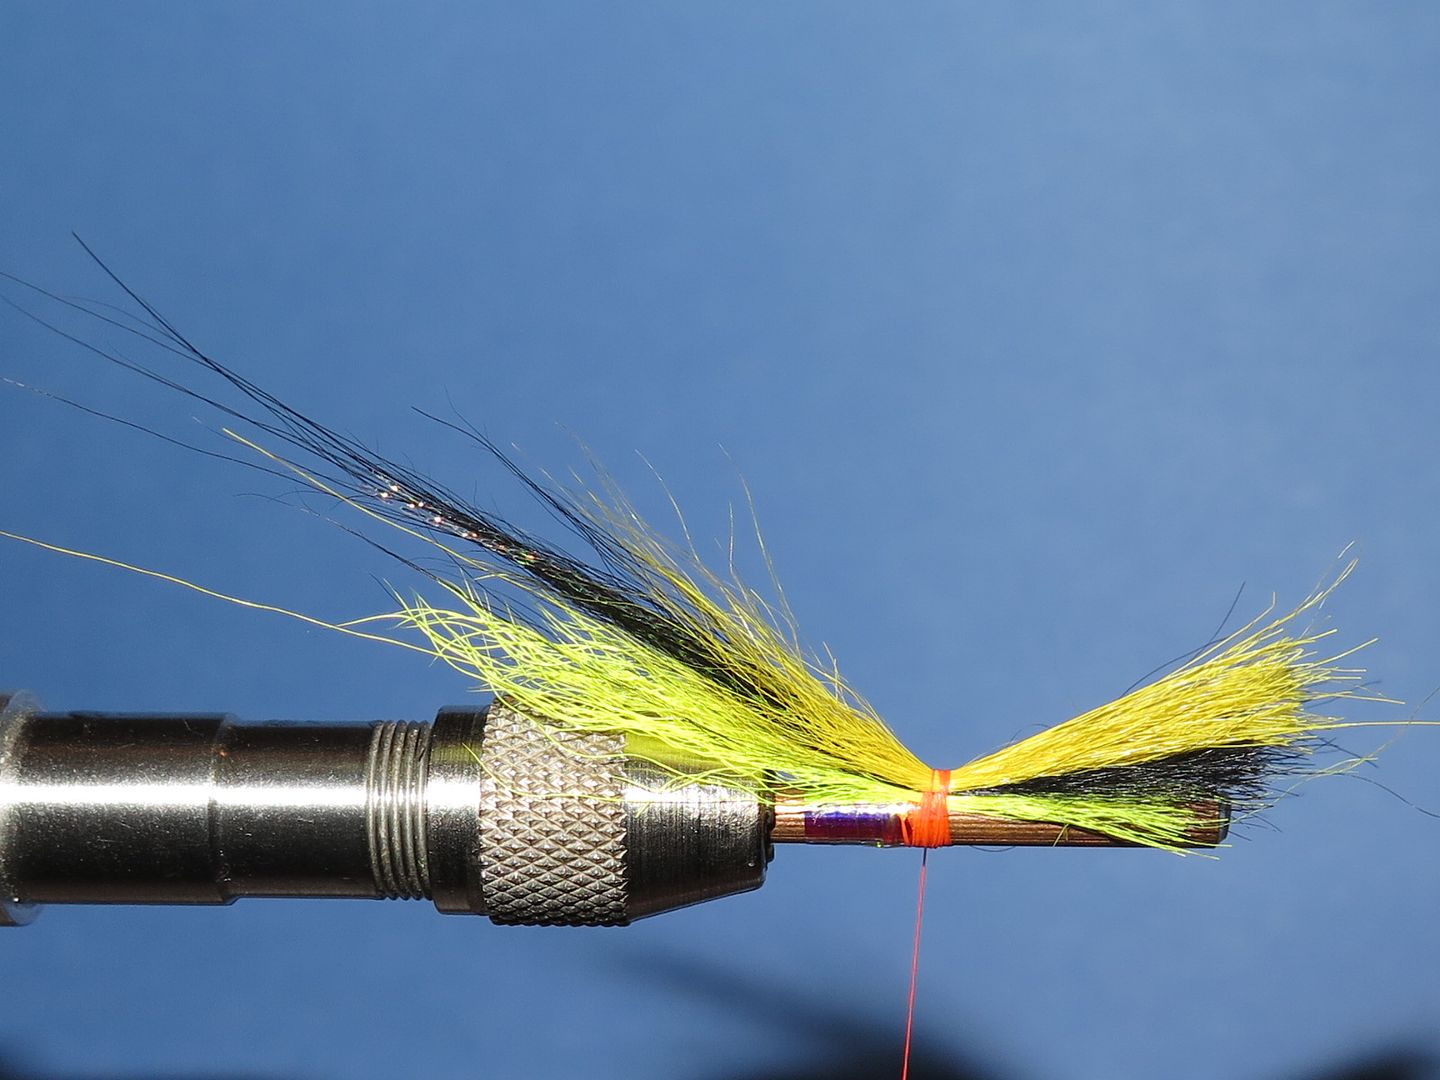
Step 9: Trim the waste ends of the tail material at approximately the length of the body. Tie in a length of fine French Oval tinsel. Wind the thread back to the rear end of the body binding down the waste ends of the tail material as you progress. This will prevent lumps and bumps in the body profile.
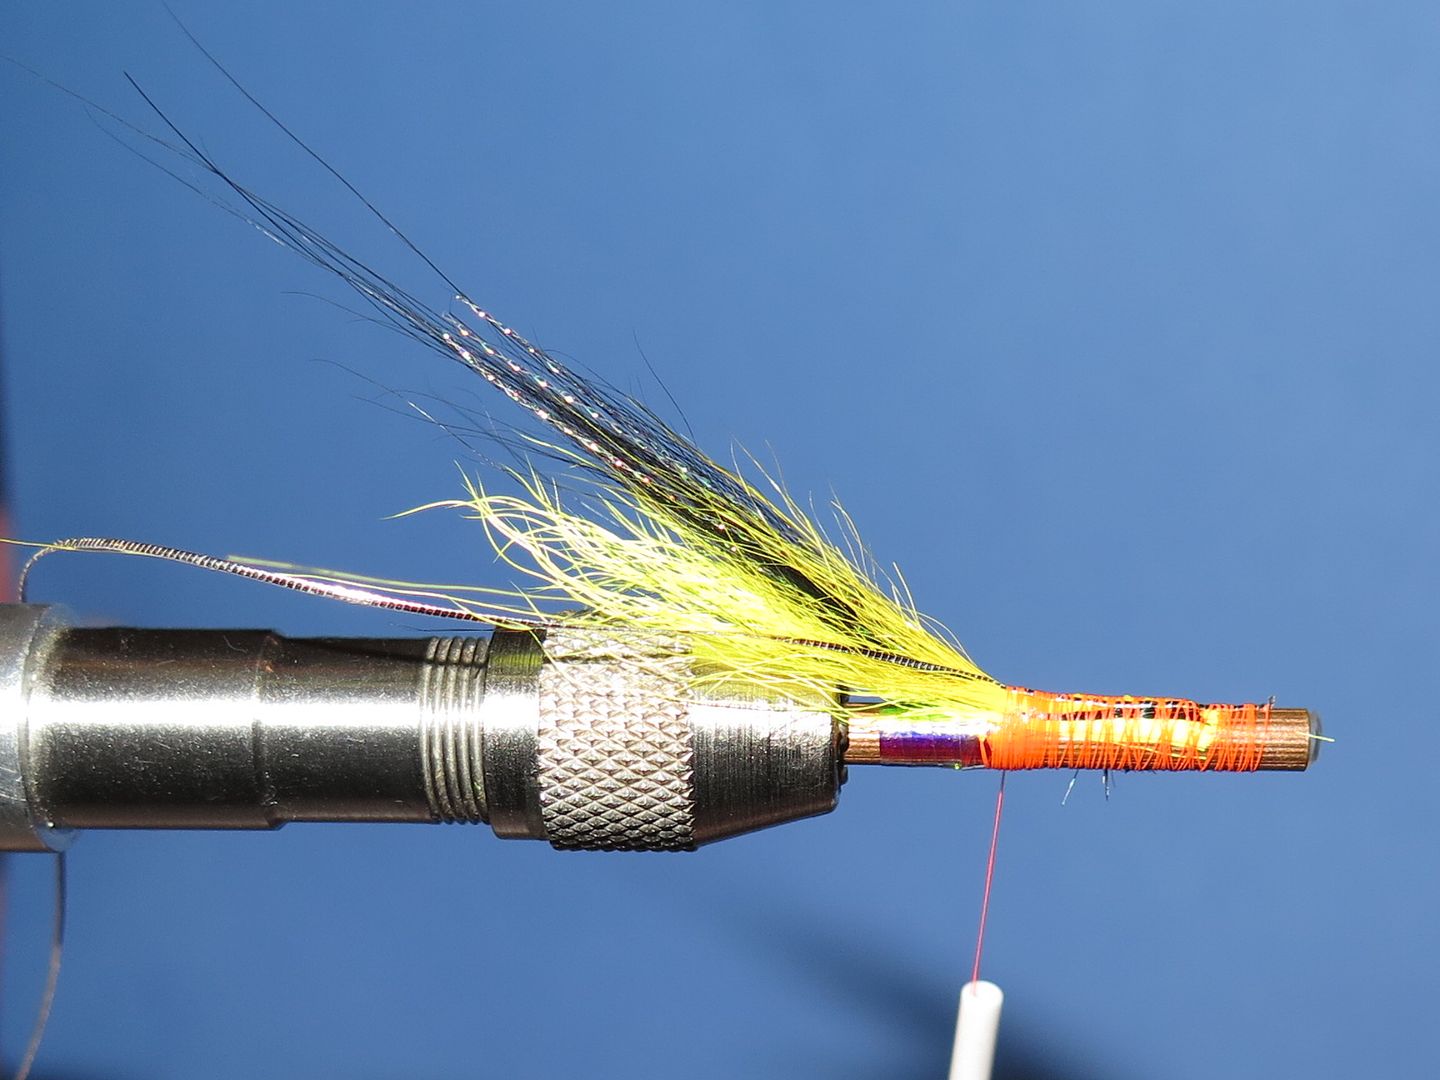
Step 10: Apply SMALL bunches of black dyed baby seals fur to the tying thread and dub to form a SLIM rope. If you apply too little you can always add a little more. if you apply too much then removing it is difficult and will result in a pattern that looks like Billy Bunter.
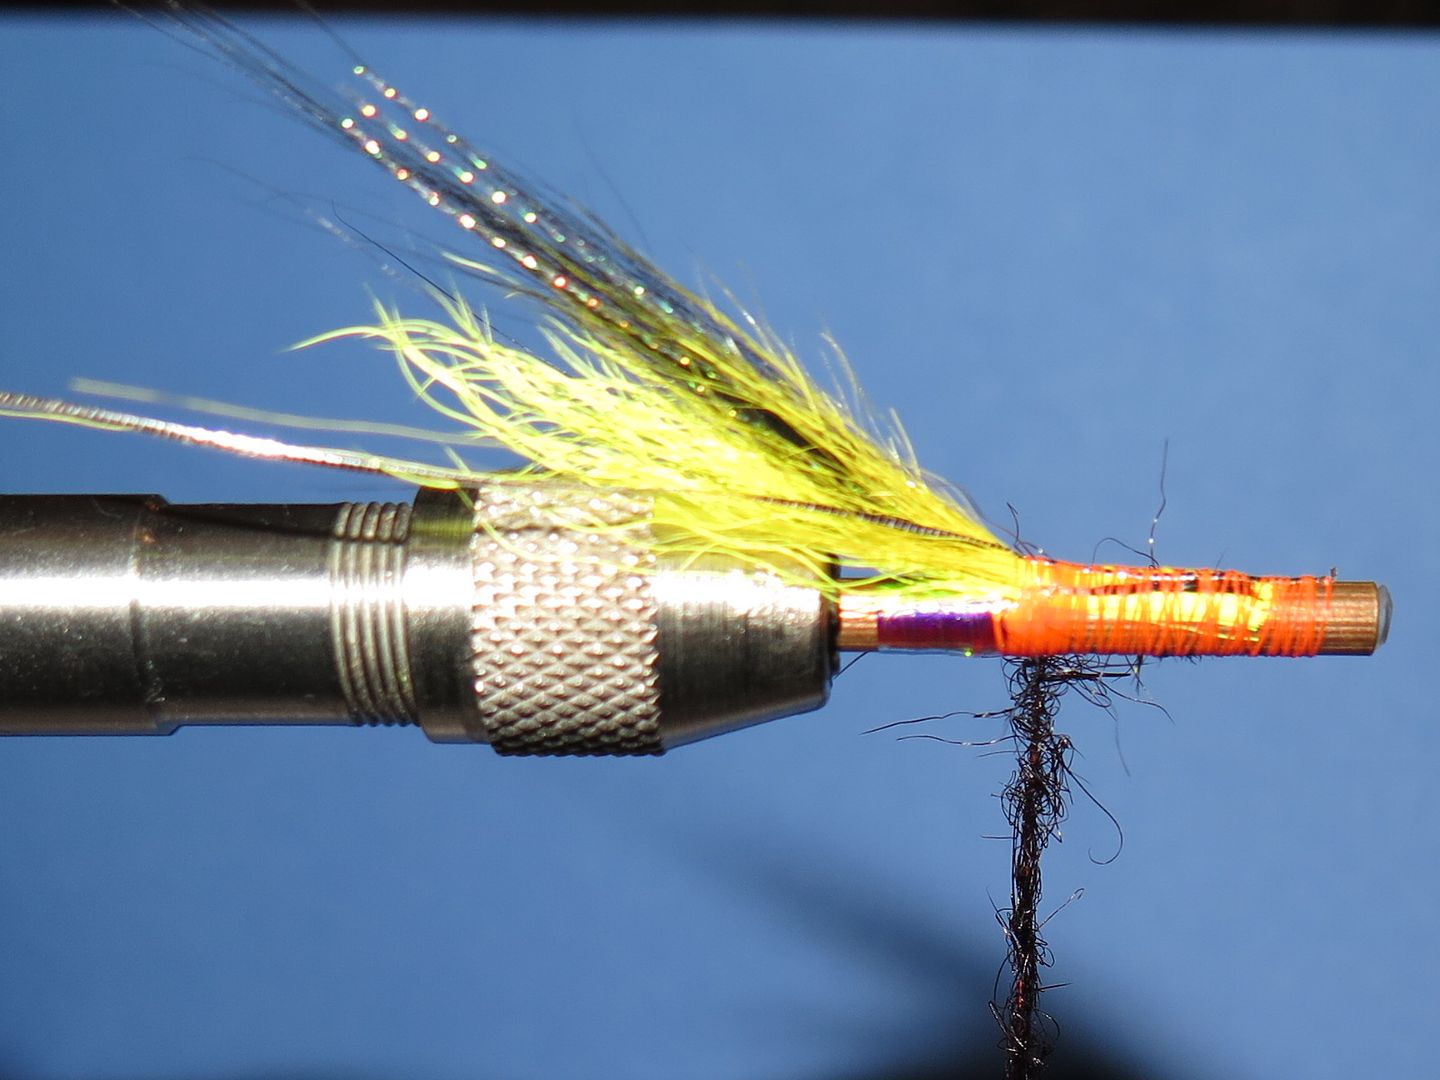
Step 11: Wind the dubbing rope in touching turns.
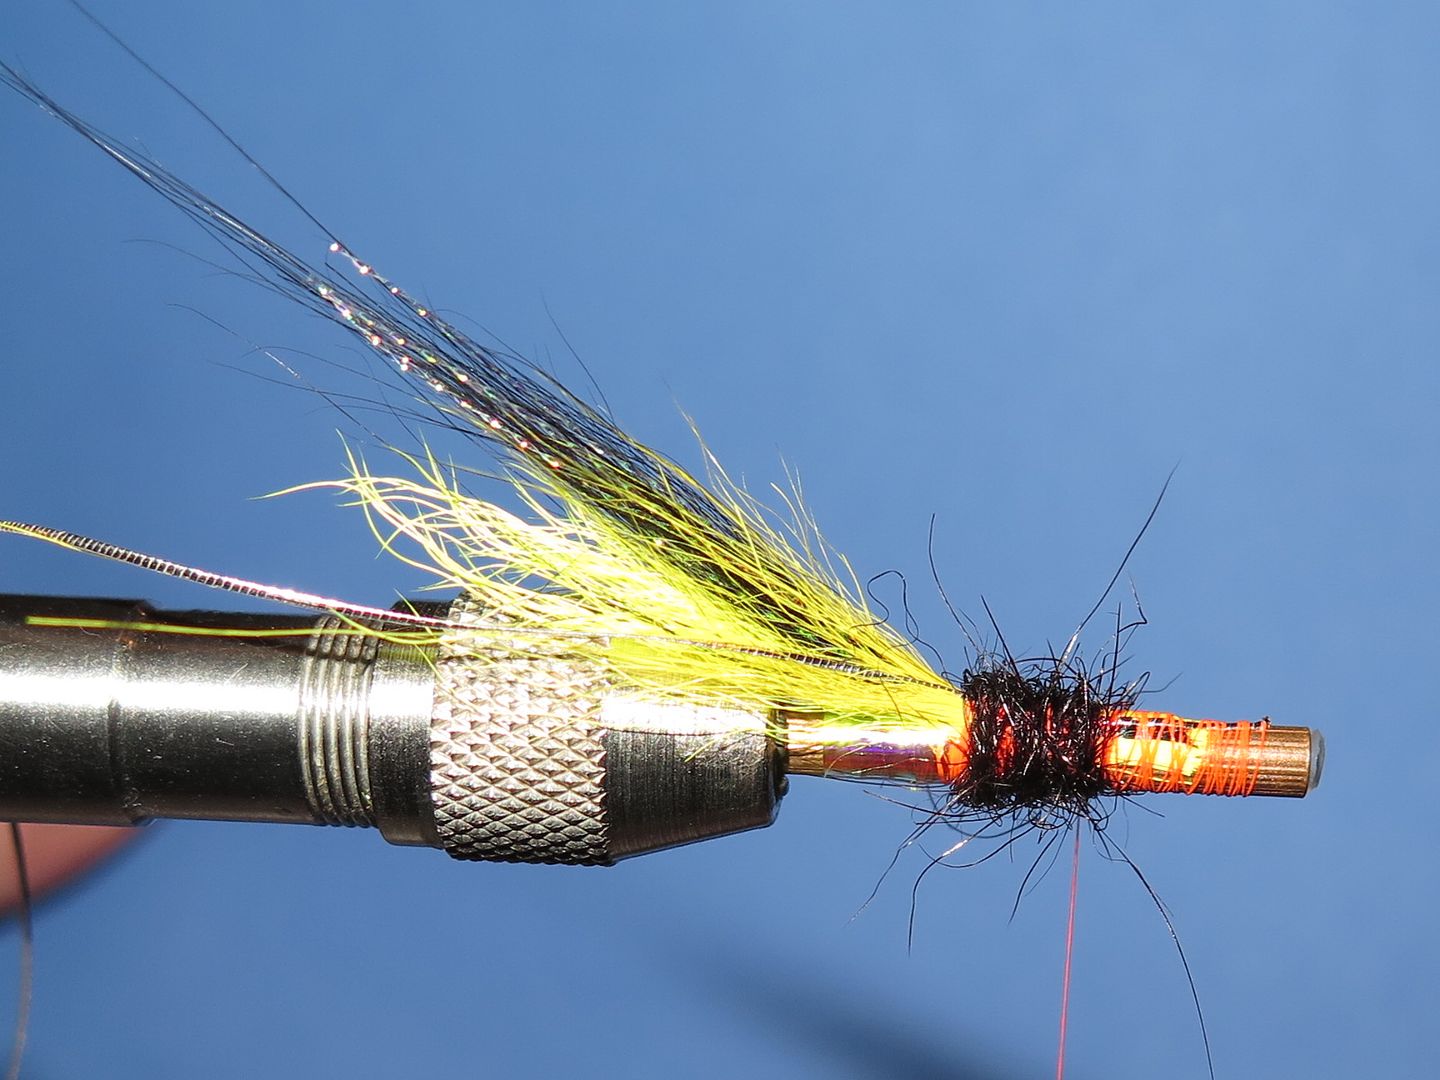
Step 12: Contimue applying dubbing material and winding until body is complete.
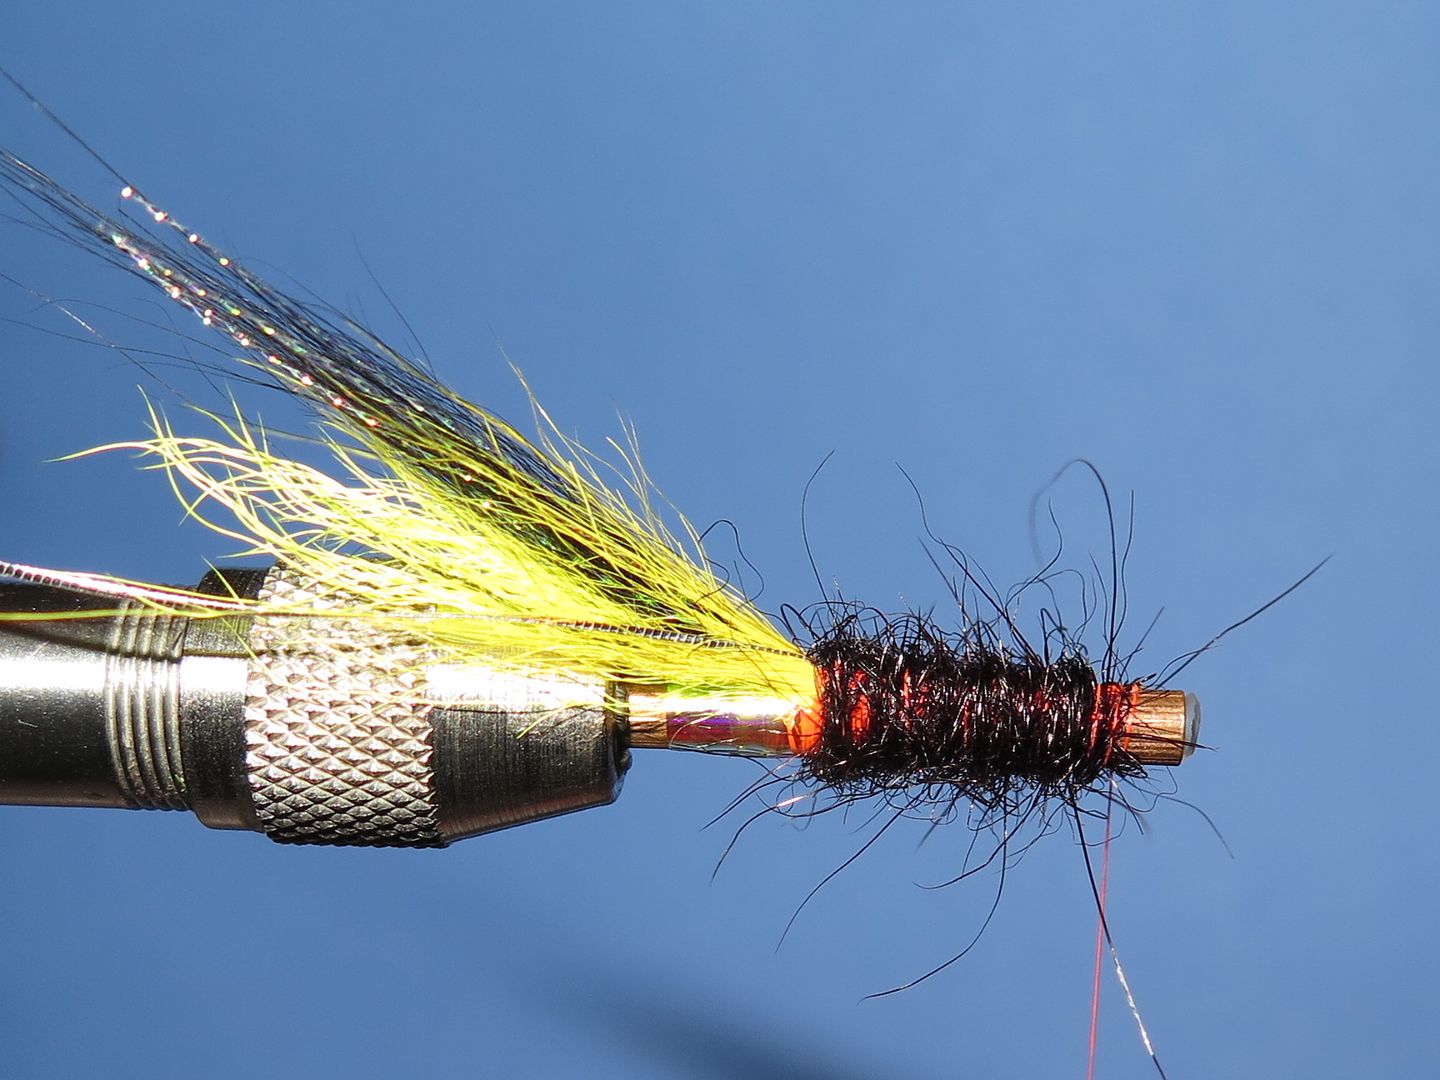
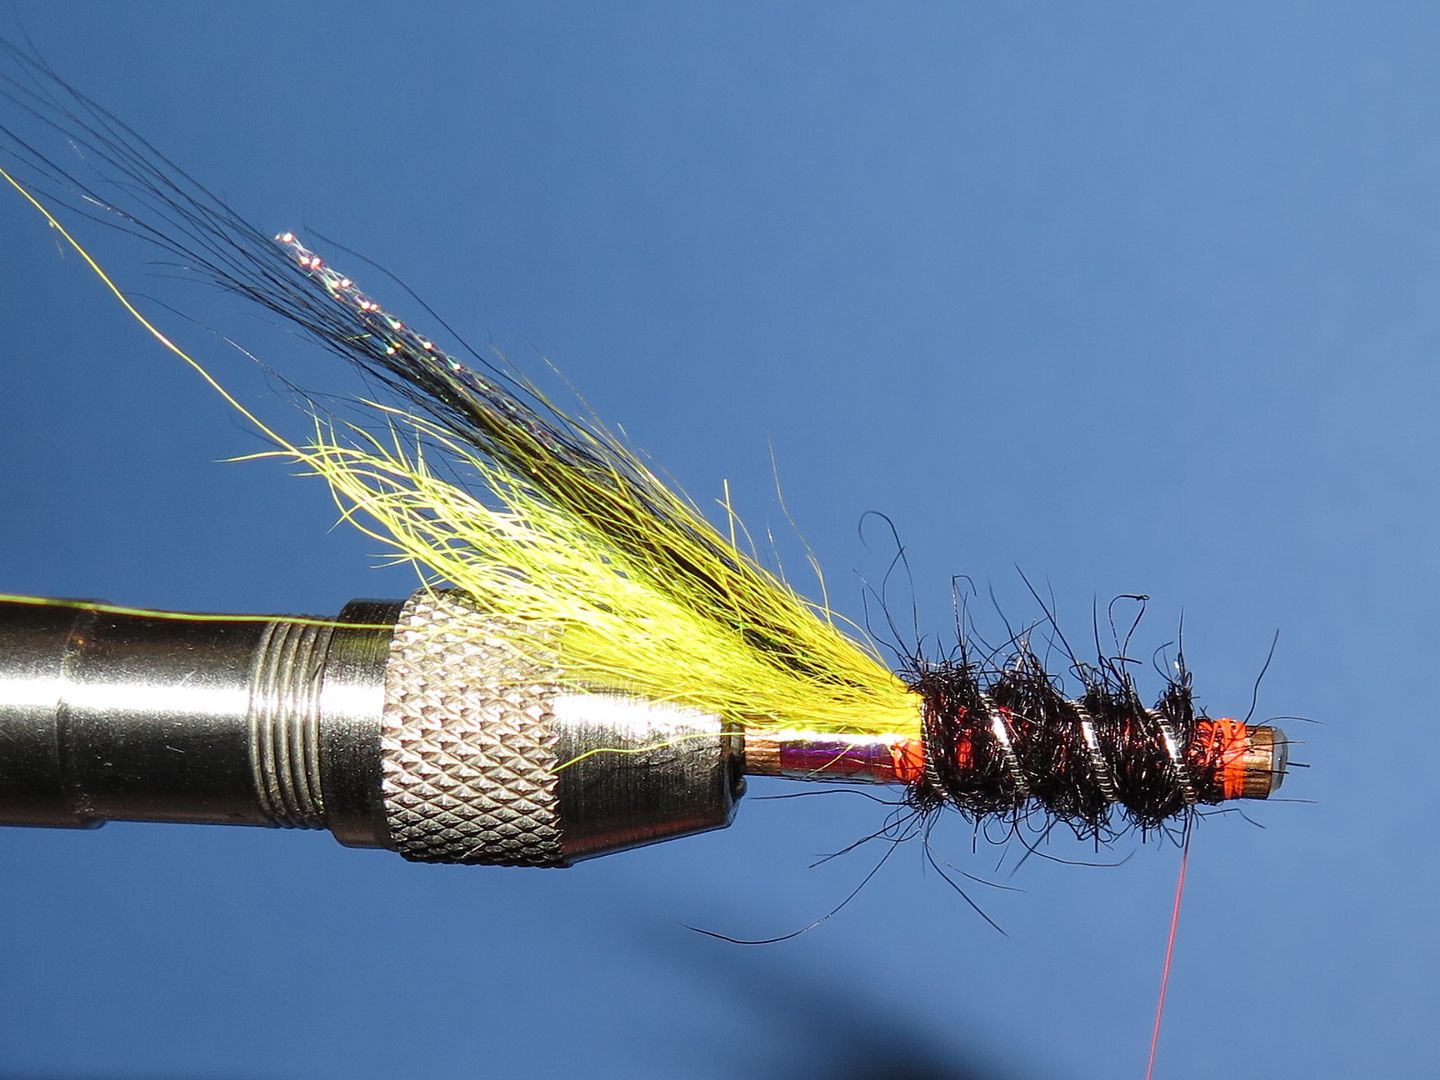
Step 13: Wind the French Oval in open turns the opposite direction from which you have wound the dubbing to form rib.
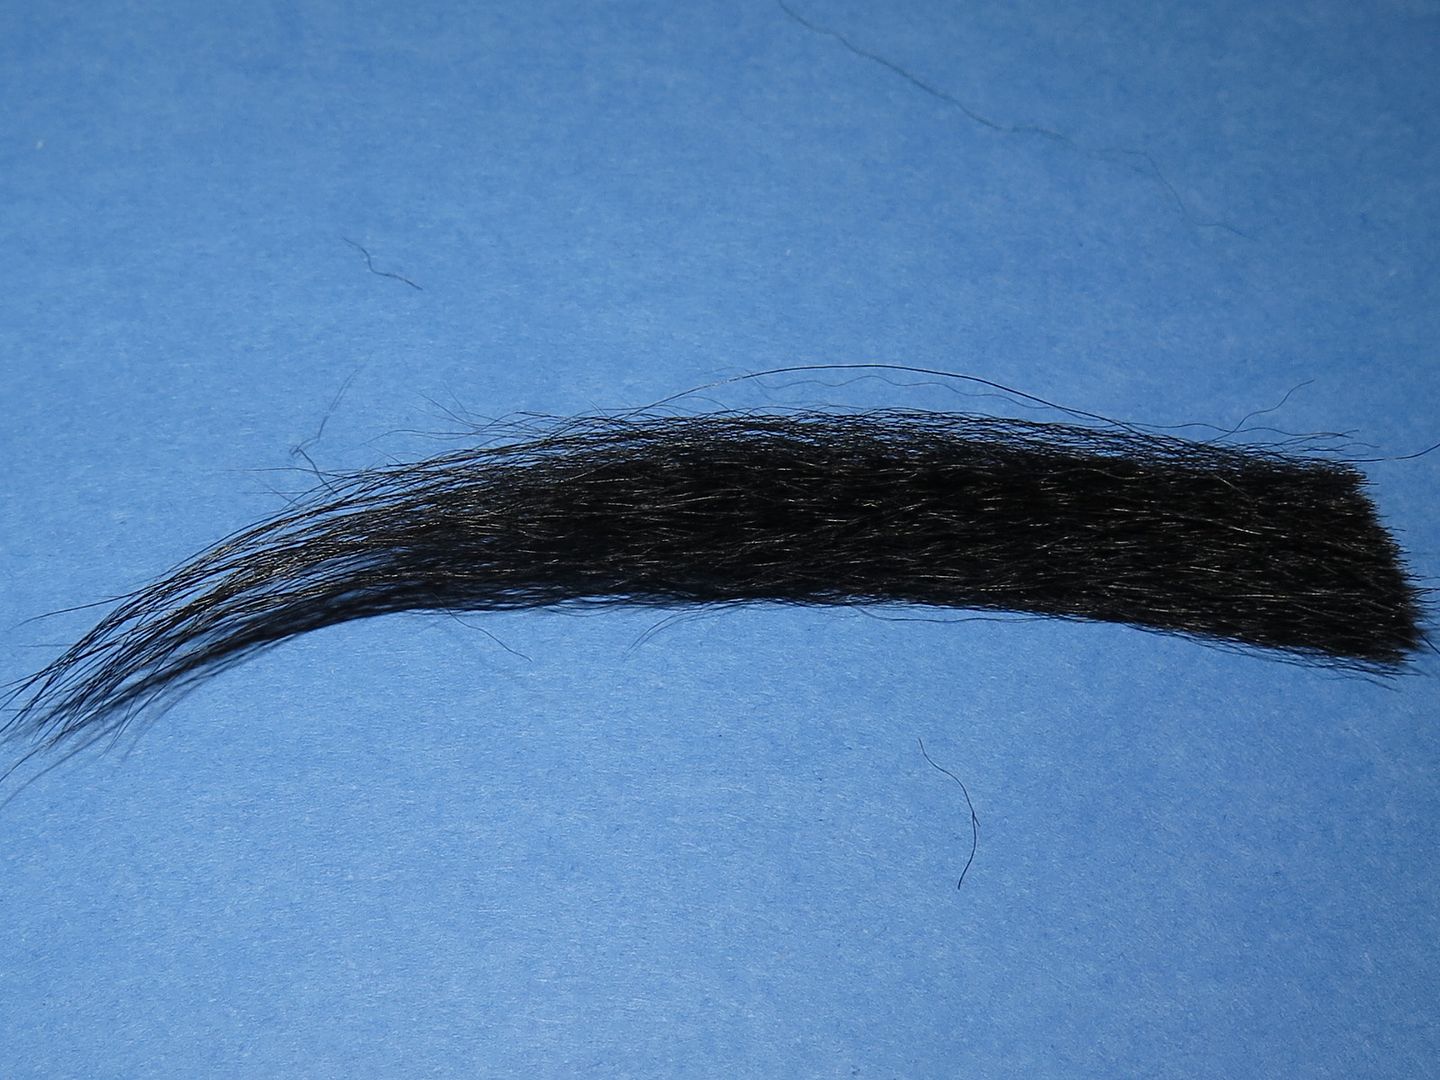
Step 14: Cut a clump of black dyed Arctic fox from a tail. Remove waste material from base and comb out any damaged fibres. Pinch the base and gently twist the ends of the fibres working with he natural bias of the fur. This will accentuate the natural curve of the fur.
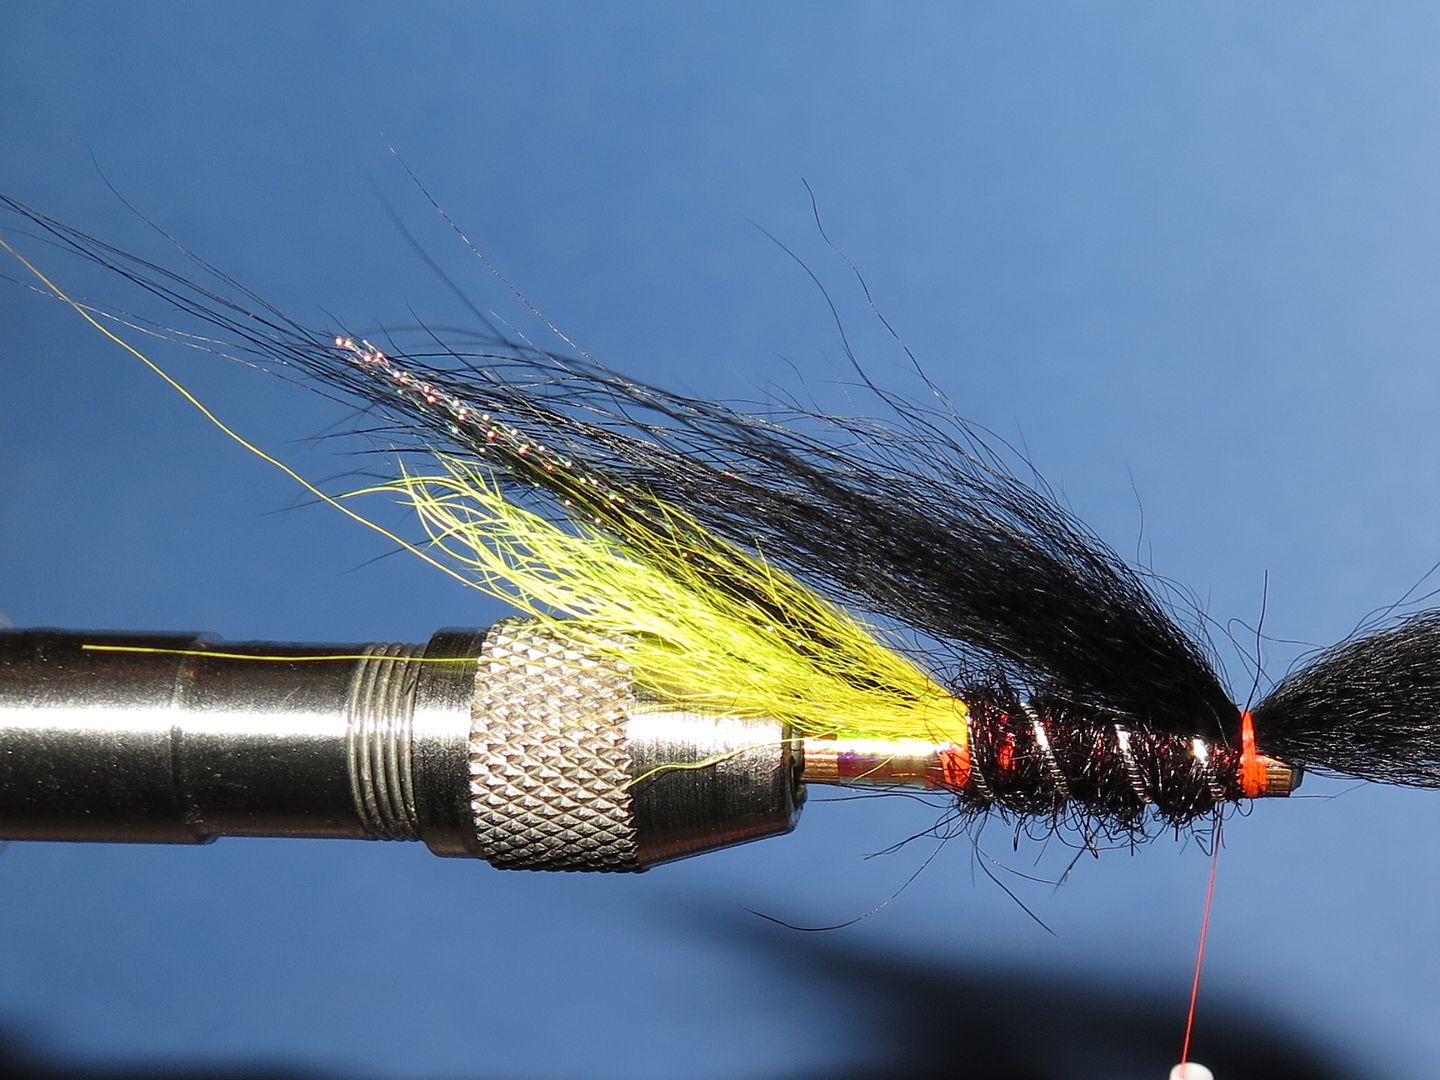
Step 15: Tie in the fur so that the ends of the fibres culminate at the ends of the tail.
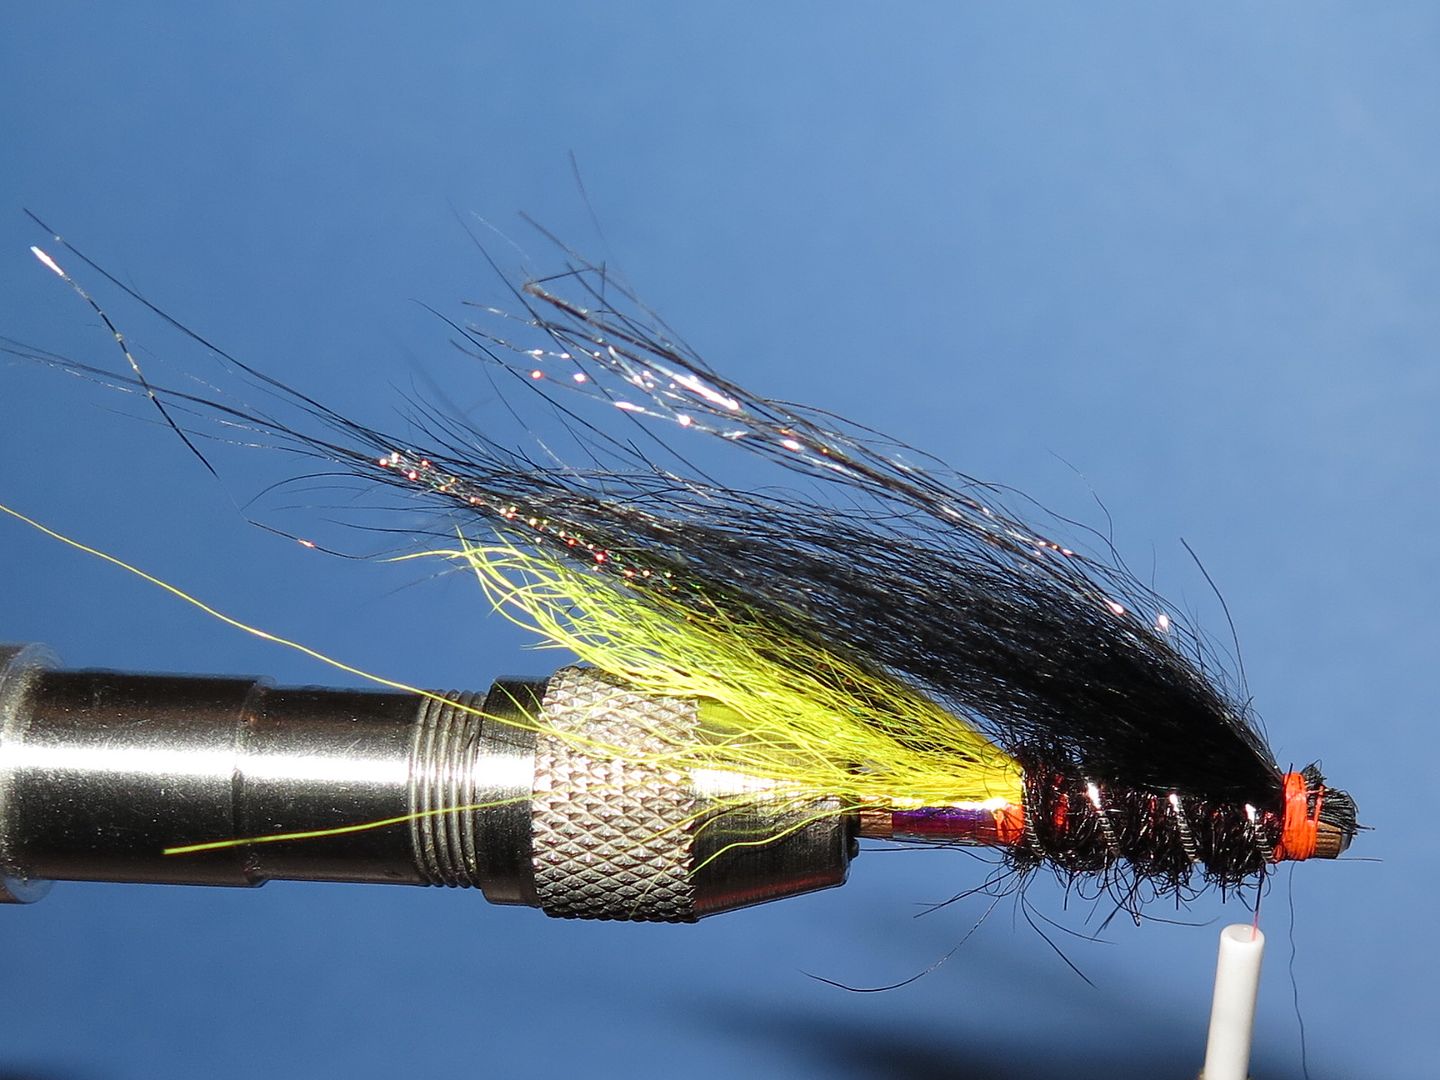
Step 16: Trim the waste ends of the wing and bind down the stub ends. Overlay the wing with some fine silver Angel Hair.
Step 17: Tie in a pair of jungle cock nails as cheeks.
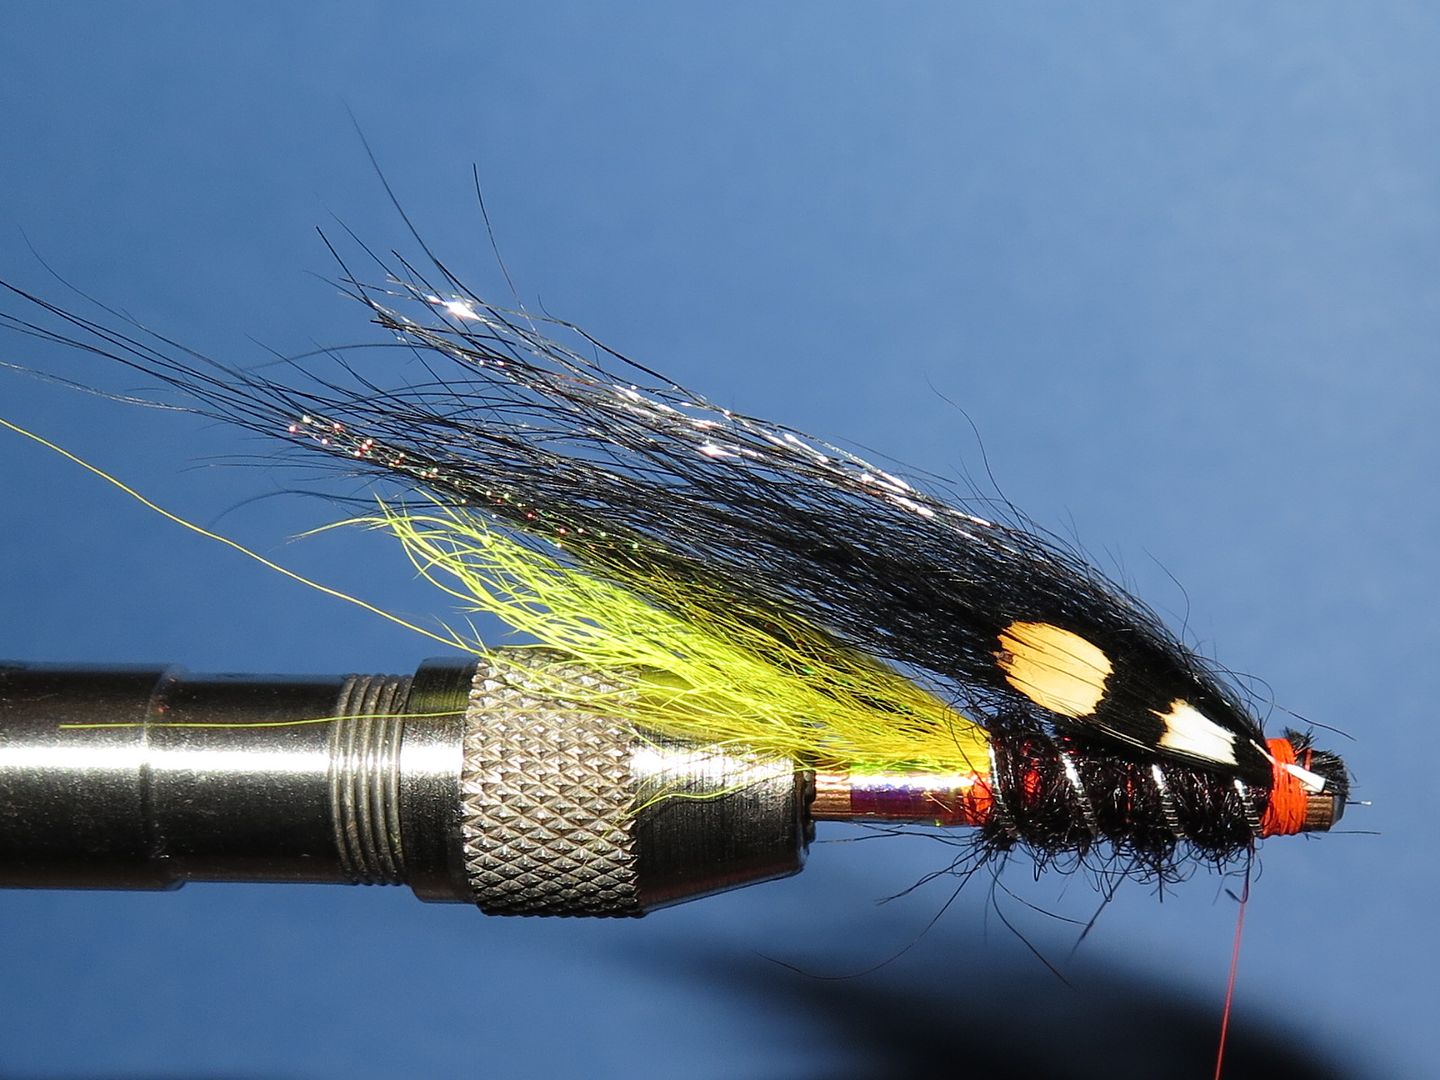
Step 18: Prepare a yellow dyed hen saddle hackle as shown and tie in.
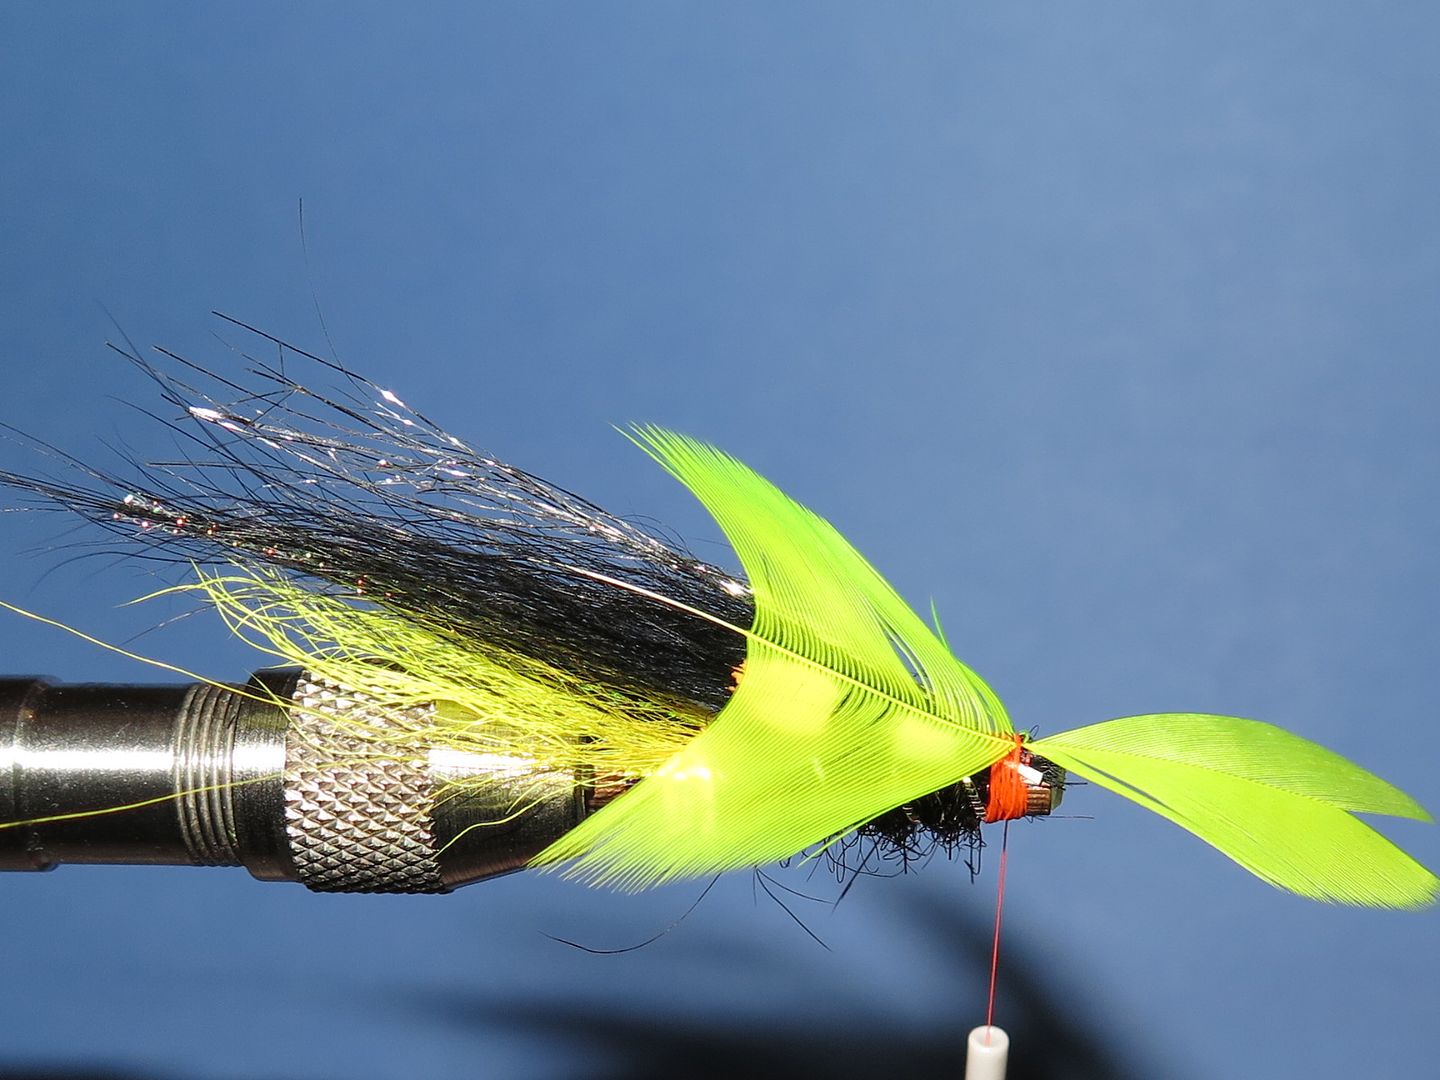
Step 19: Wind the hackle and tie in.
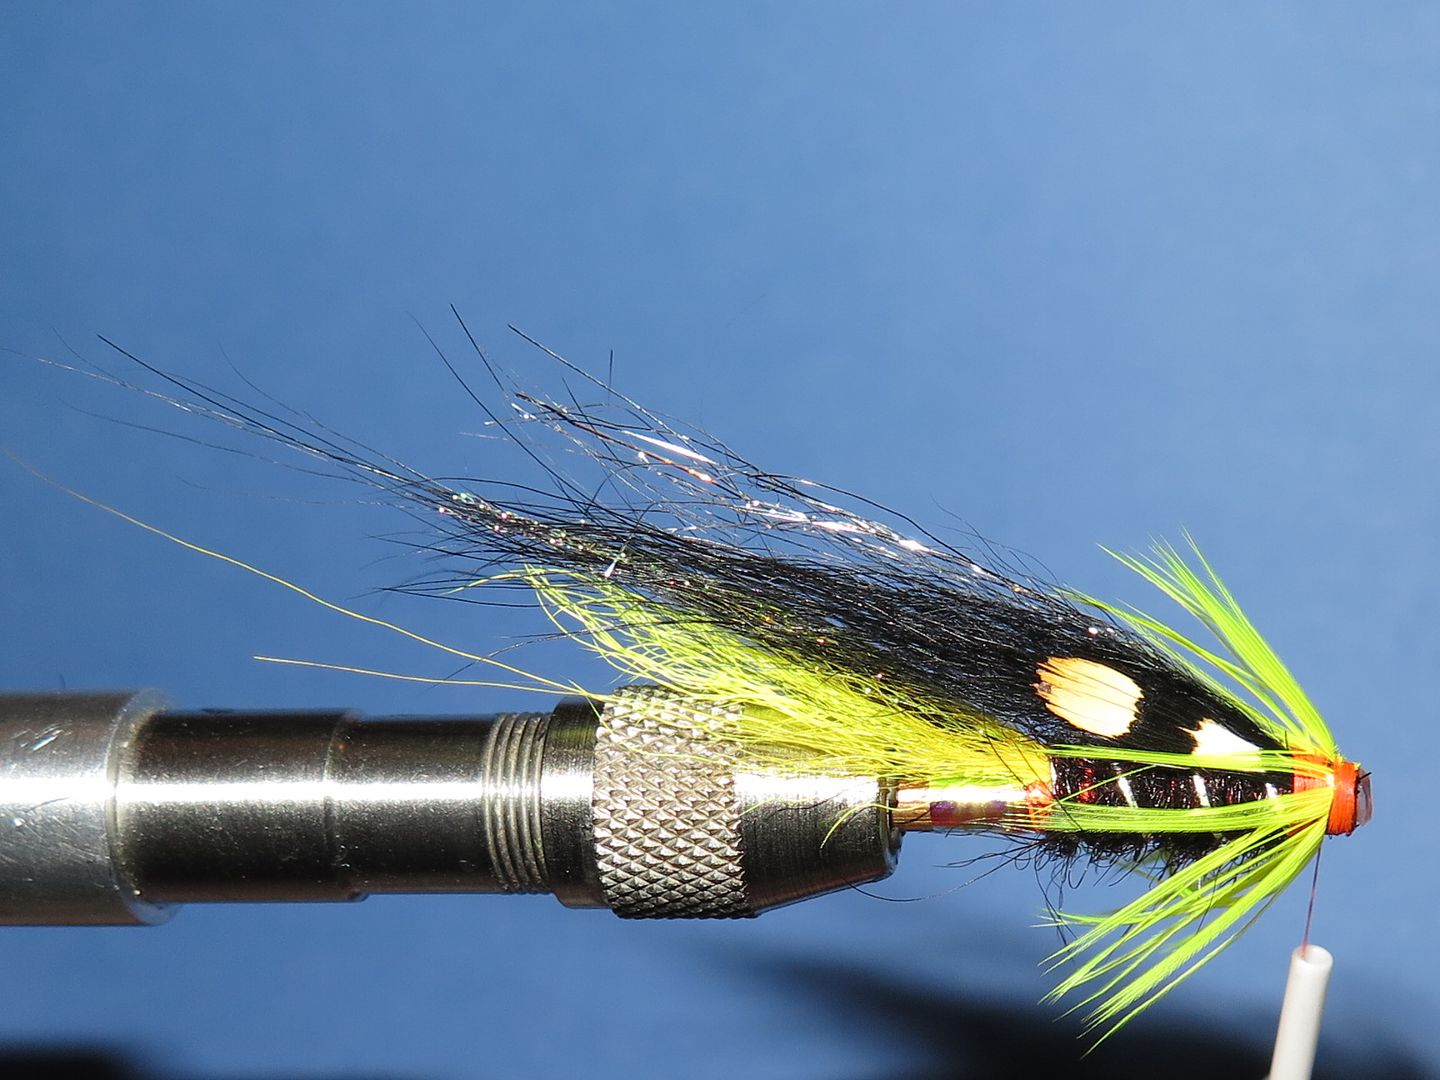
Step 20: Whip finish and varnish to complete
Tying Material
Tube: Veniard copper Slipstream 1" long
Thread: Uni 6/0 fire orange
Tag: Large Opal Mirage Uni tinsel
Tail: Yellow dyed calf tail overlaid with black dyed Arctic Runner overlaid with doubled strands of fine mother of pearl Krystalflash overlaid with yellow dyed Arctic runner
Rib: Medium silver French Oval
Body: Black dyed baby seals fur
Wing: Black dyed Arctic fox overlaid with fine silver Angel Hair
Cheeks: Jungle cock nails
Hackle: Yellow dyed Chevron hen saddle
Tying Method
Step 1: Seccure the tube in the collet

Step 2: Attach thread rear of centre of tube

Step 3: Cut a length of large Opal Mirage tinsel to a sharp point and catch in with a couple of turns of tying thread.

Step 4: Wind the tinsel to the back of the tube and forward again. We are looking to cover approximately 1/4 of the tube length. Tie in and trim waste end.

Step 5: Tie in a slim 'pouffe' of yellow dyed calf tail. It should be noted at this stage that the original pattern calls for Arctic Runner at this stage. While offering suoerb mobility this product has a tendency to wrap and foul hook points if unsupported.

Step 6: Overlay the calf tail with a slim bunch of black dyed Arctic Runner. The material should extend longer than the yellow calf tail.

Step 7: Overlay the material with 2 doubled lengths of fine mother of pearl Krystalflash. Trim to approximately the length of the black material.

Step 8: Overlay the composite tail with the final material which is yellow dyed Arctic Runner. It should be tied in shorter than the previous black layer.

Step 9: Trim the waste ends of the tail material at approximately the length of the body. Tie in a length of fine French Oval tinsel. Wind the thread back to the rear end of the body binding down the waste ends of the tail material as you progress. This will prevent lumps and bumps in the body profile.

Step 10: Apply SMALL bunches of black dyed baby seals fur to the tying thread and dub to form a SLIM rope. If you apply too little you can always add a little more. if you apply too much then removing it is difficult and will result in a pattern that looks like Billy Bunter.

Step 11: Wind the dubbing rope in touching turns.

Step 12: Contimue applying dubbing material and winding until body is complete.

Step 13: Wind the French Oval in open turns the opposite direction from which you have wound the dubbing to form rib.

Step 14: Cut a clump of black dyed Arctic fox from a tail. Remove waste material from base and comb out any damaged fibres. Pinch the base and gently twist the ends of the fibres working with he natural bias of the fur. This will accentuate the natural curve of the fur.

Step 15: Tie in the fur so that the ends of the fibres culminate at the ends of the tail.

Step 16: Trim the waste ends of the wing and bind down the stub ends. Overlay the wing with some fine silver Angel Hair.

Step 17: Tie in a pair of jungle cock nails as cheeks.

Step 18: Prepare a yellow dyed hen saddle hackle as shown and tie in.

Step 19: Wind the hackle and tie in.

Step 20: Whip finish and varnish to complete


Comment